Virtualization is a powerful tool. It’s kind of like the psychological aspect of visualization, but on a completely higher level. You’re able to immerse yourself in a world that’s not actually there. When we’re talking about the power of visualization in the spectrum of psychology, this simply means that you’re envisioning something right before your eyes, and it actually helps you reach your target much quicker, giving you the proper motivation. An idea of what something has the potential to become, so to speak.
What about in computing, though? Well, over the years, software distribution has changed drastically; from software originating on what was called “plug boards”, which then became punch tape, then floppy disks, and now, well software distribution has changed entirely, completely changing the course of the tech world as we know it.
This is where VirtualBox comes into play. It’s a visualization tool that allows us to virtualize different operating systems without installing them onto our hard drive. It’s similar to simply opening a browser, but instead, an entire OS loads within your current OS. (Yes, it’s Inception. A dream within a dream)!
Today, I’m going to guide you as to how you can install and set up VirtualBox on Deepin Linux (but you can follow along regardless of the OS you use, as the software is cross-platform).
First Thing’s First: Install VirtualBox.
If you prefer using the terminal, simply type the following commands for the successful installation of the latest VirtualBox.
First, Add Oracle VirtualBox Keys To Your System
wget -q https://www.virtualbox.org/download/oracle_vbox_2016.asc -O- | sudo apt-key add -
wget -q https://www.virtualbox.org/download/oracle_vbox.asc -O- | sudo apt-key add -
Next, add the APT Repo For VirtualBox
echo "deb [arch=amd64] http://download.virtualbox.org/virtualbox/debian $(lsb_release -cs) contrib" | \
sudo tee -a /etc/apt/sources.list.d/virtualbox.list
Next, finally, install VirtualBox
sudo apt update
sudo apt install virtualbox-6.1
When prompted, type y for “yes” and wait for the installation to complete.
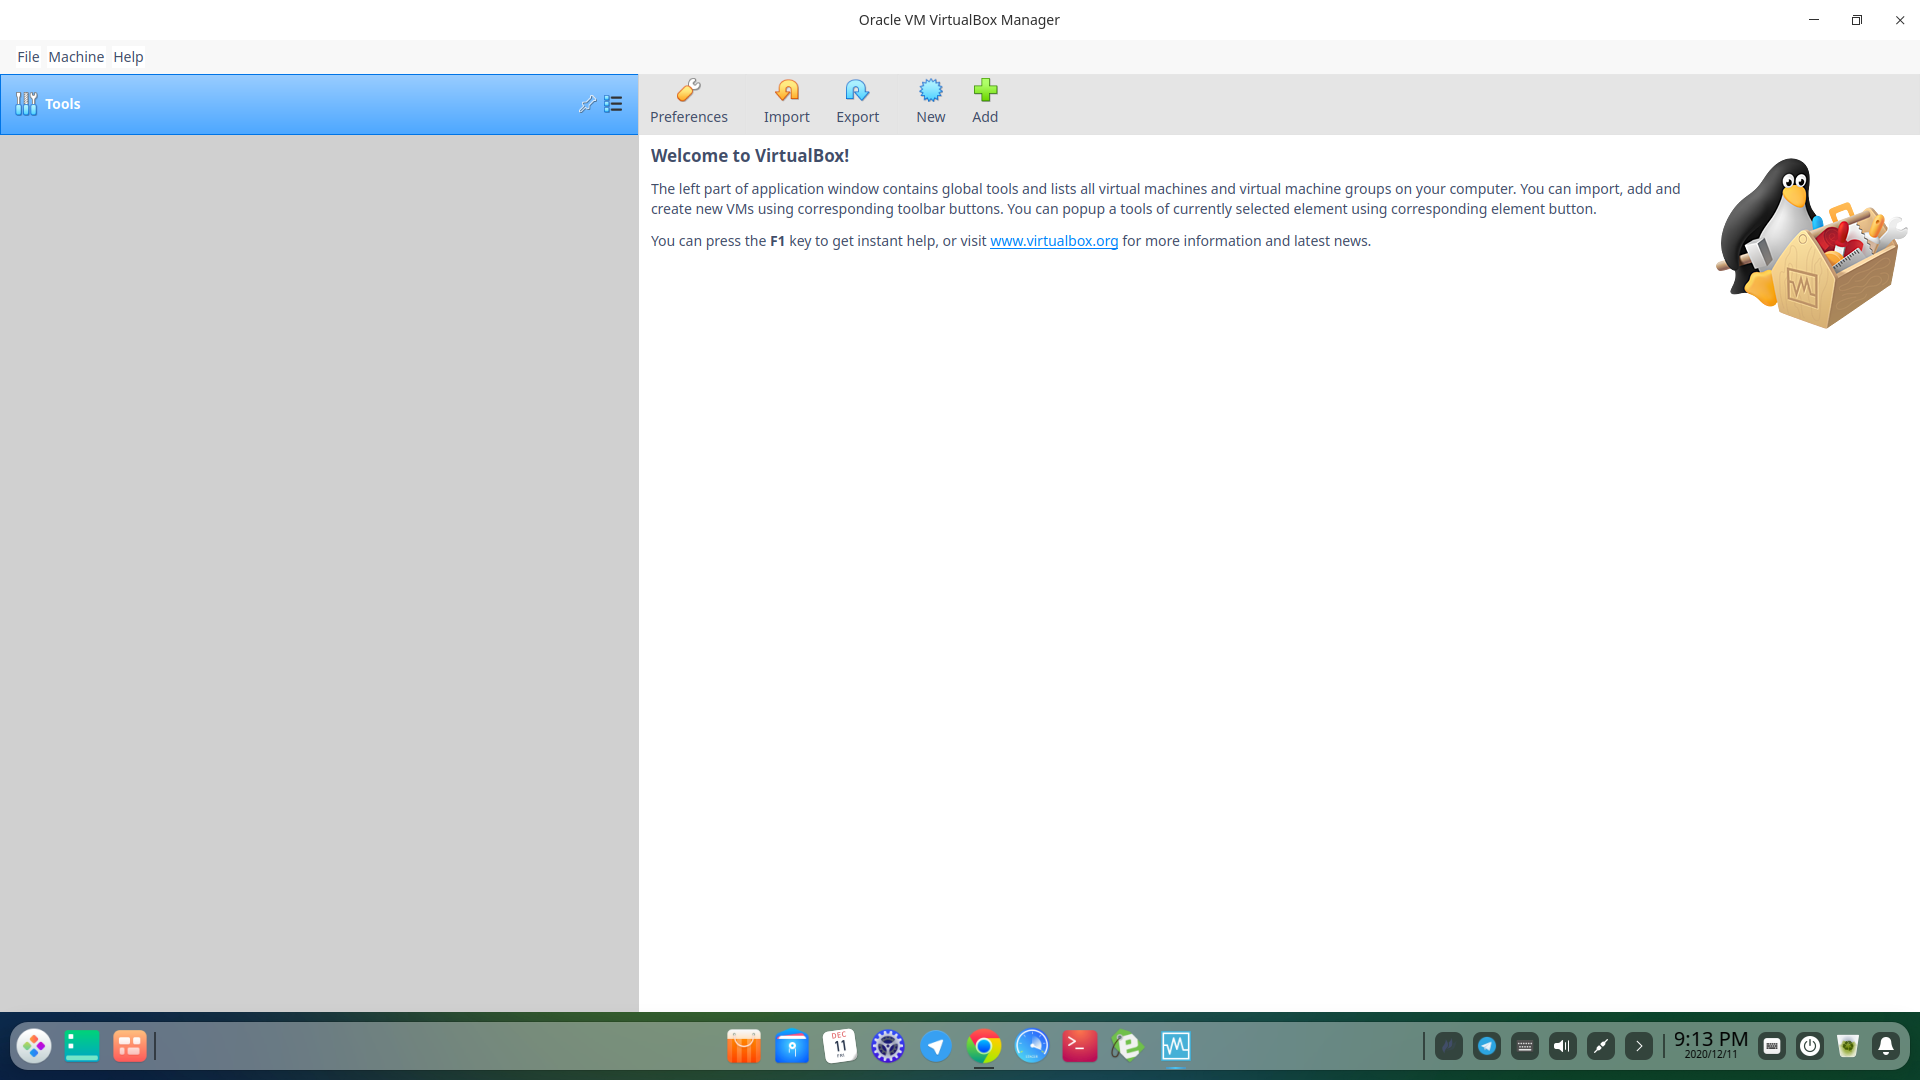
Find and launch VirtualBox from your apps menu.
Now, Choose An Operating System To Virtualize
For this scenario, we’re going to be installing the latest version of Peppermint Linux. Head over to their website by clicking here and download the latest ISO file. You can also click here for the Direct Download of Peppermint 10.
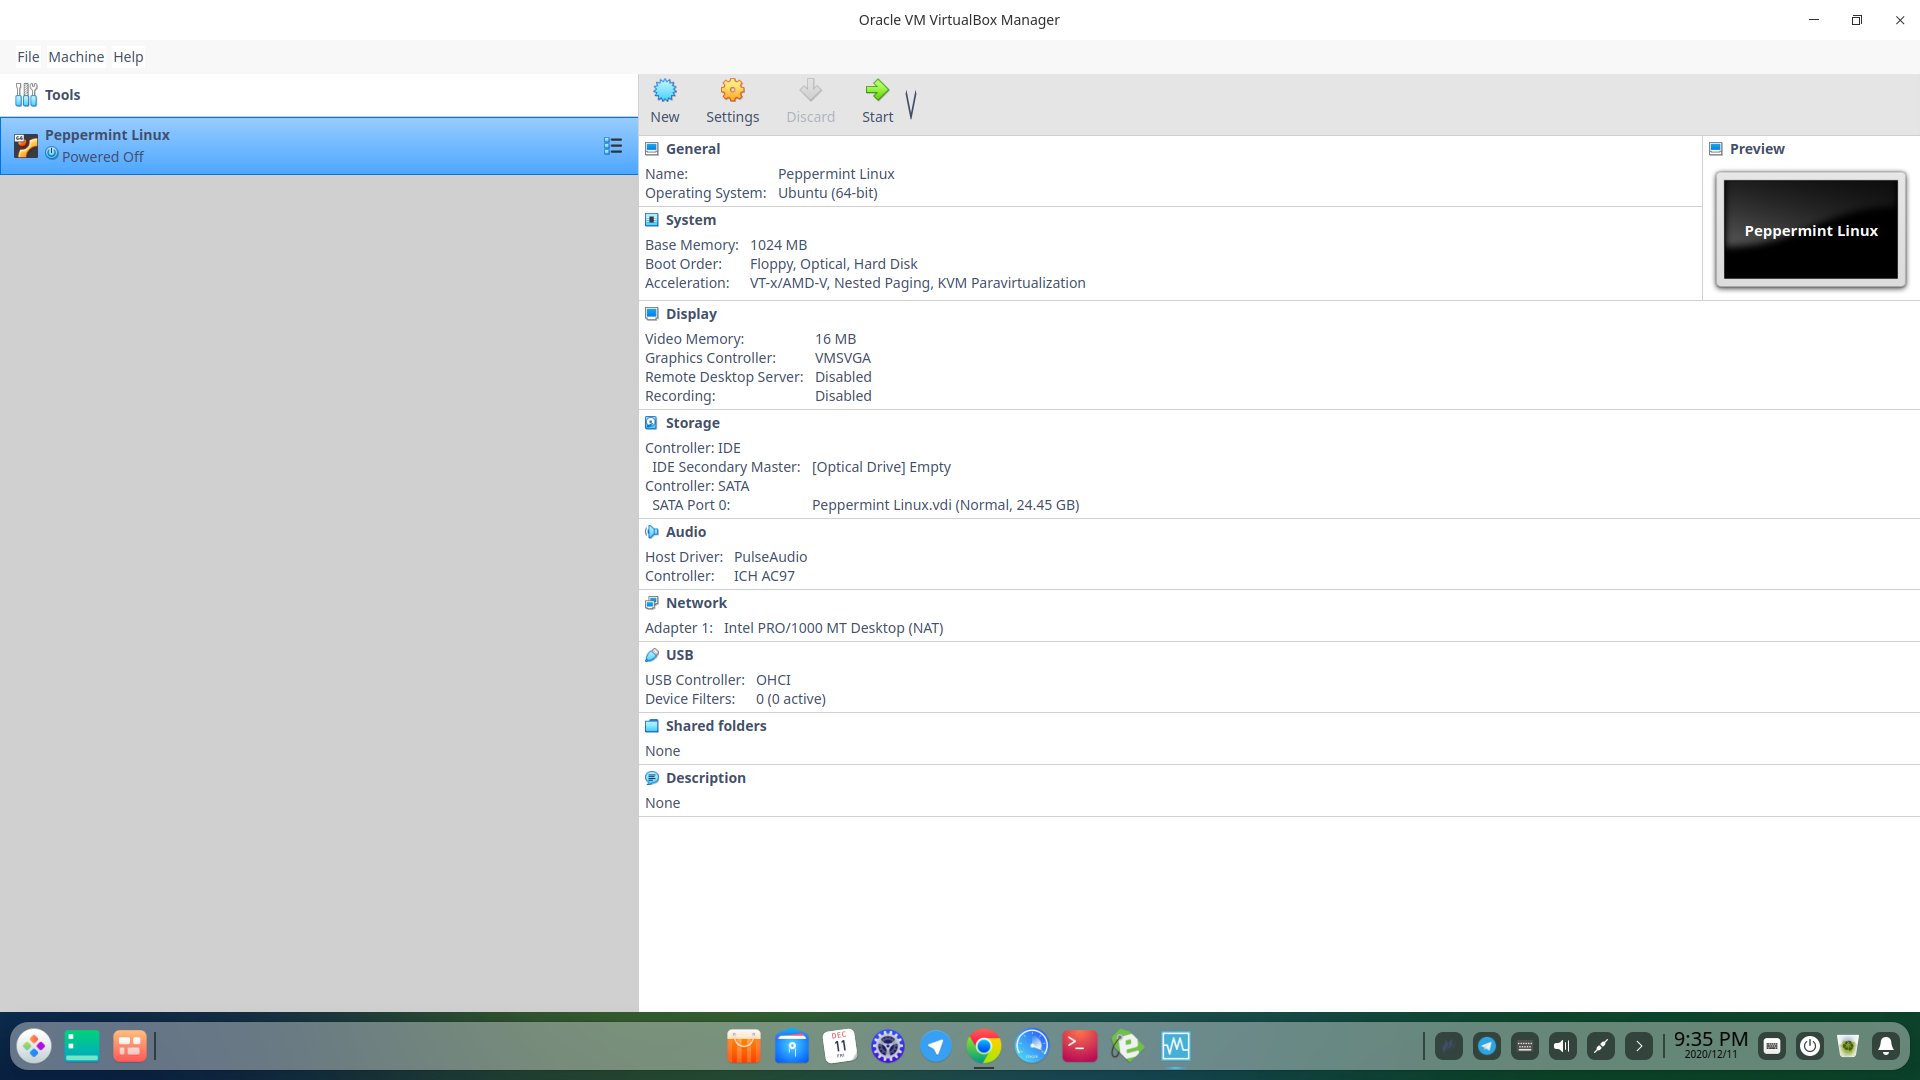
Next, what you’ll want to do is head over to VirtualBox and hit “New”
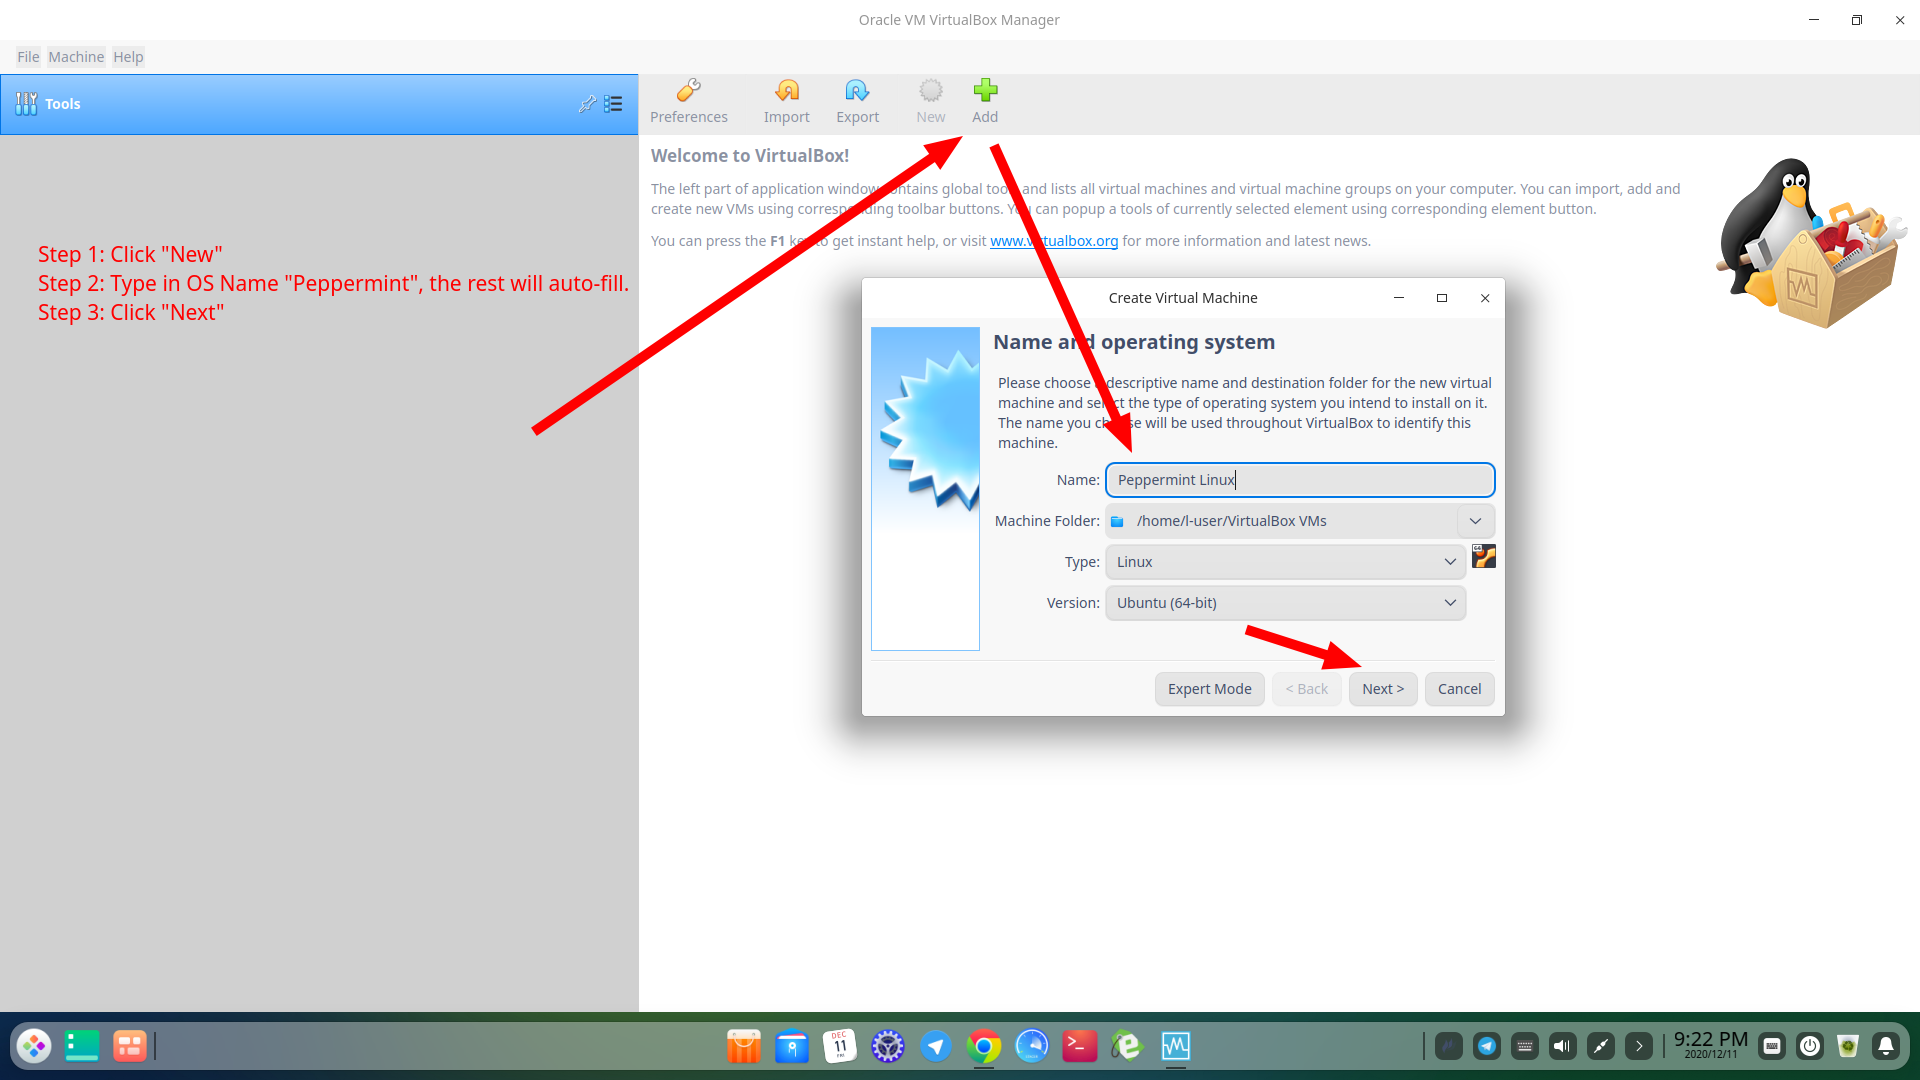
As seen in the image above:
- Step 1: Click “New”
- Step 2: Type in the OS name. The rest will auto-fill.
- Step 3: Click “Next.”
Now, we’re going to Set Memory Size.
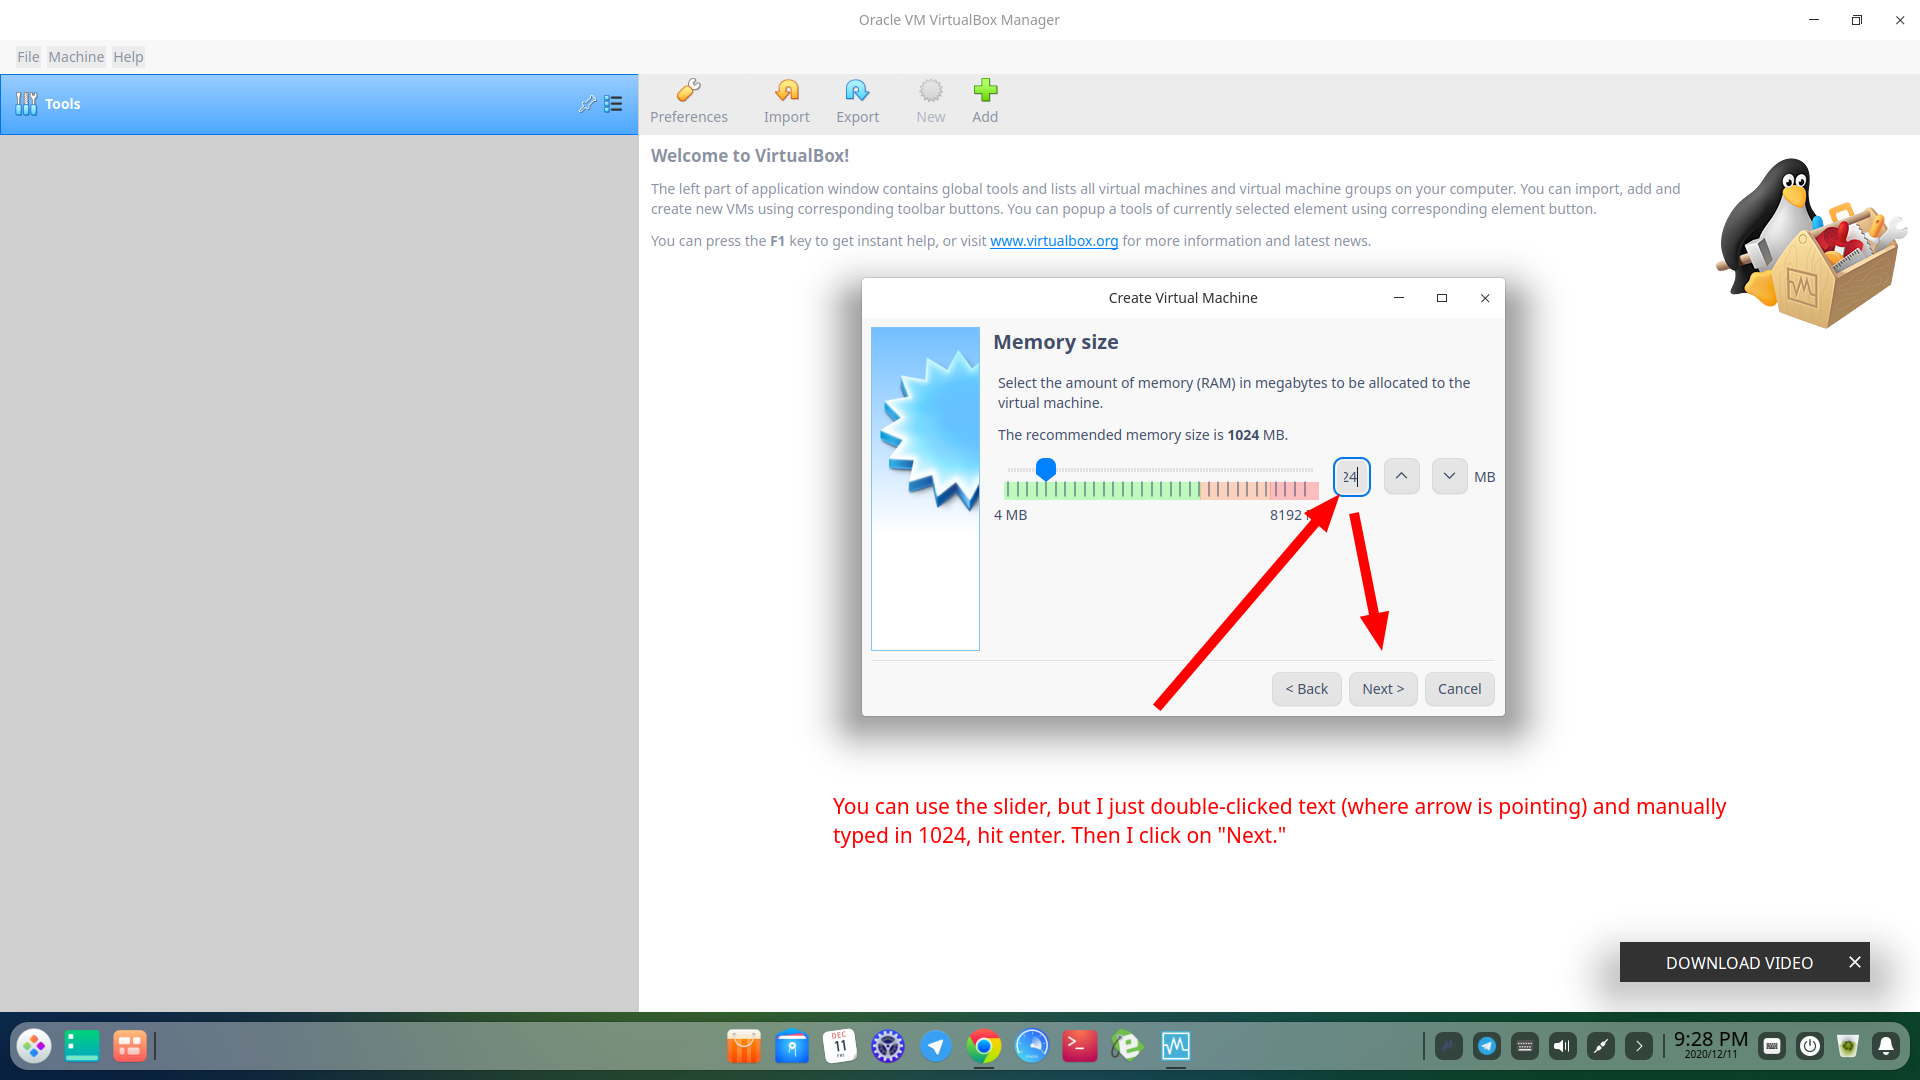
As I annotated, you can just type in 1024 in the small number box, hit Enter, and then click on “Next” for selecting Memory Size.
What follows now are a bunch of steps. Follow the screenshots.
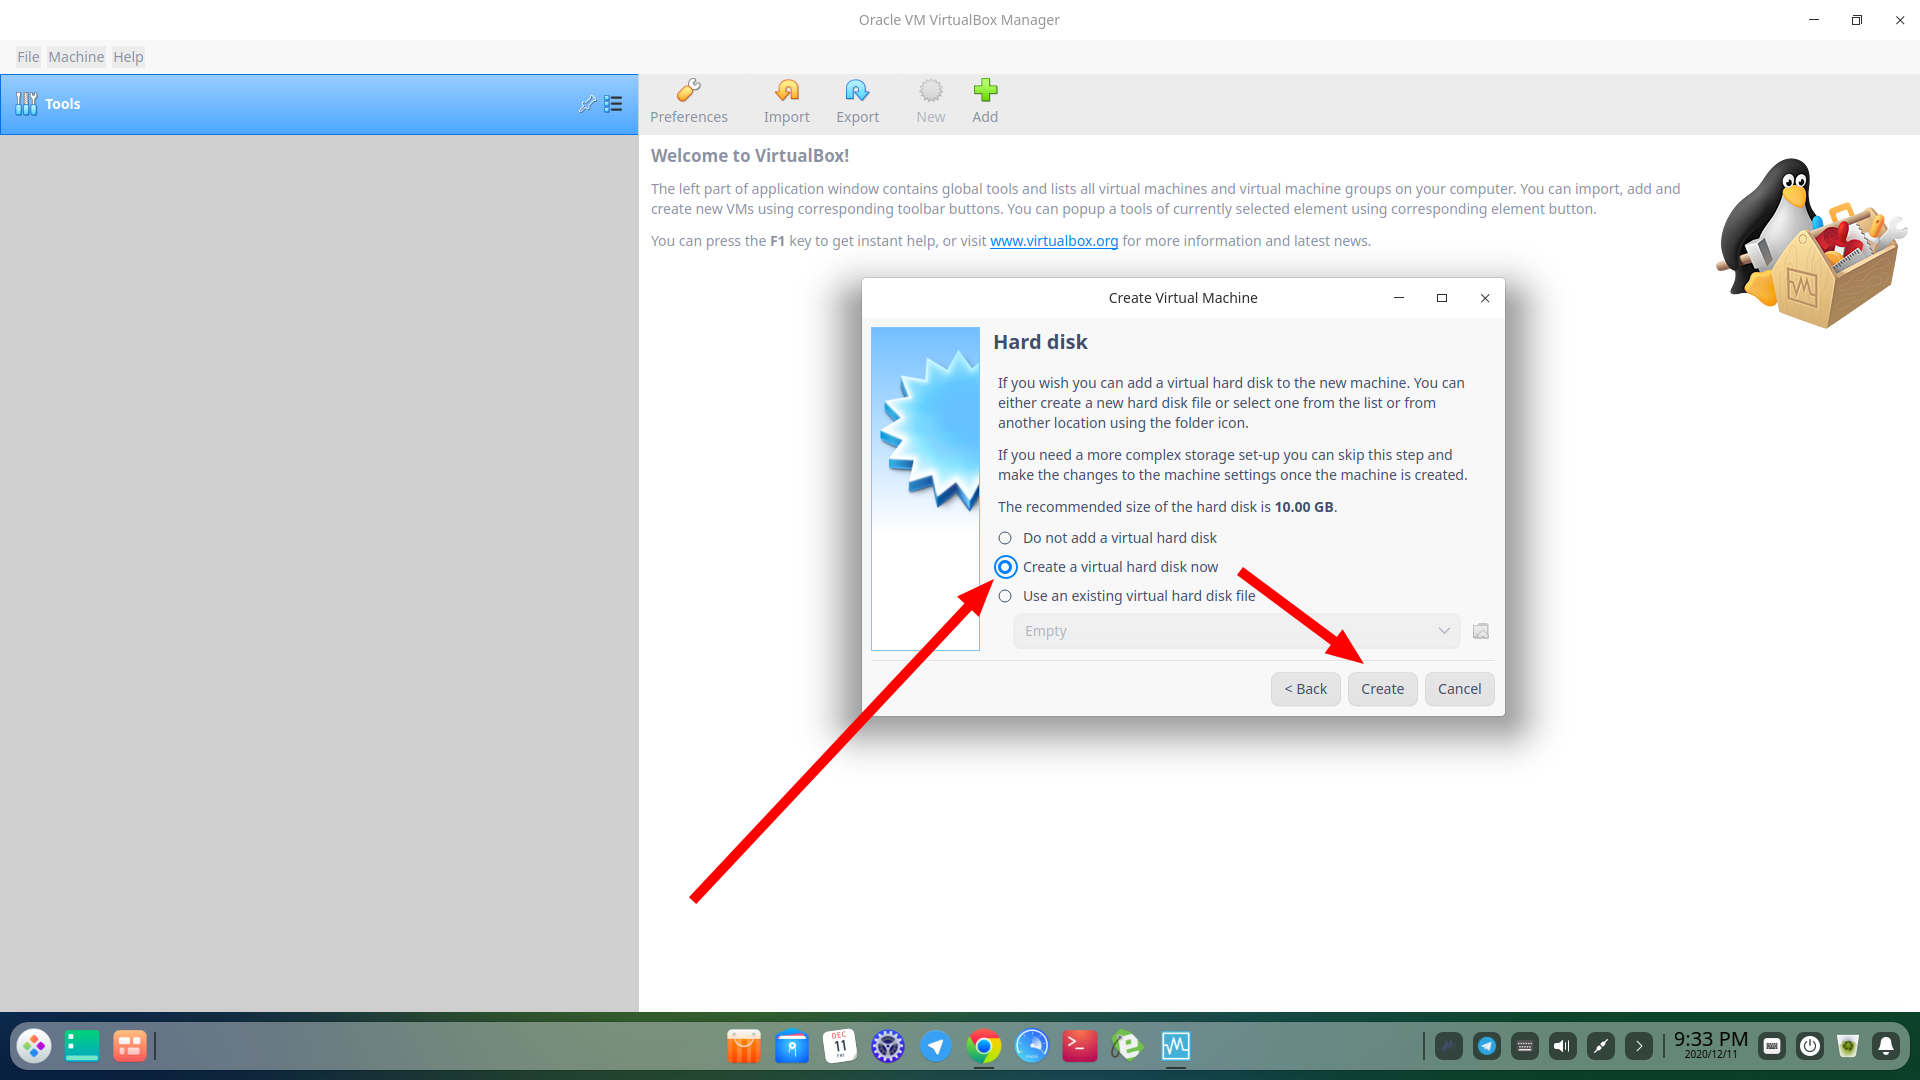
In case you prefer reading text that’s not only in an image, I will reiterate the steps.
- Select “Create a virtual hard disk now.”
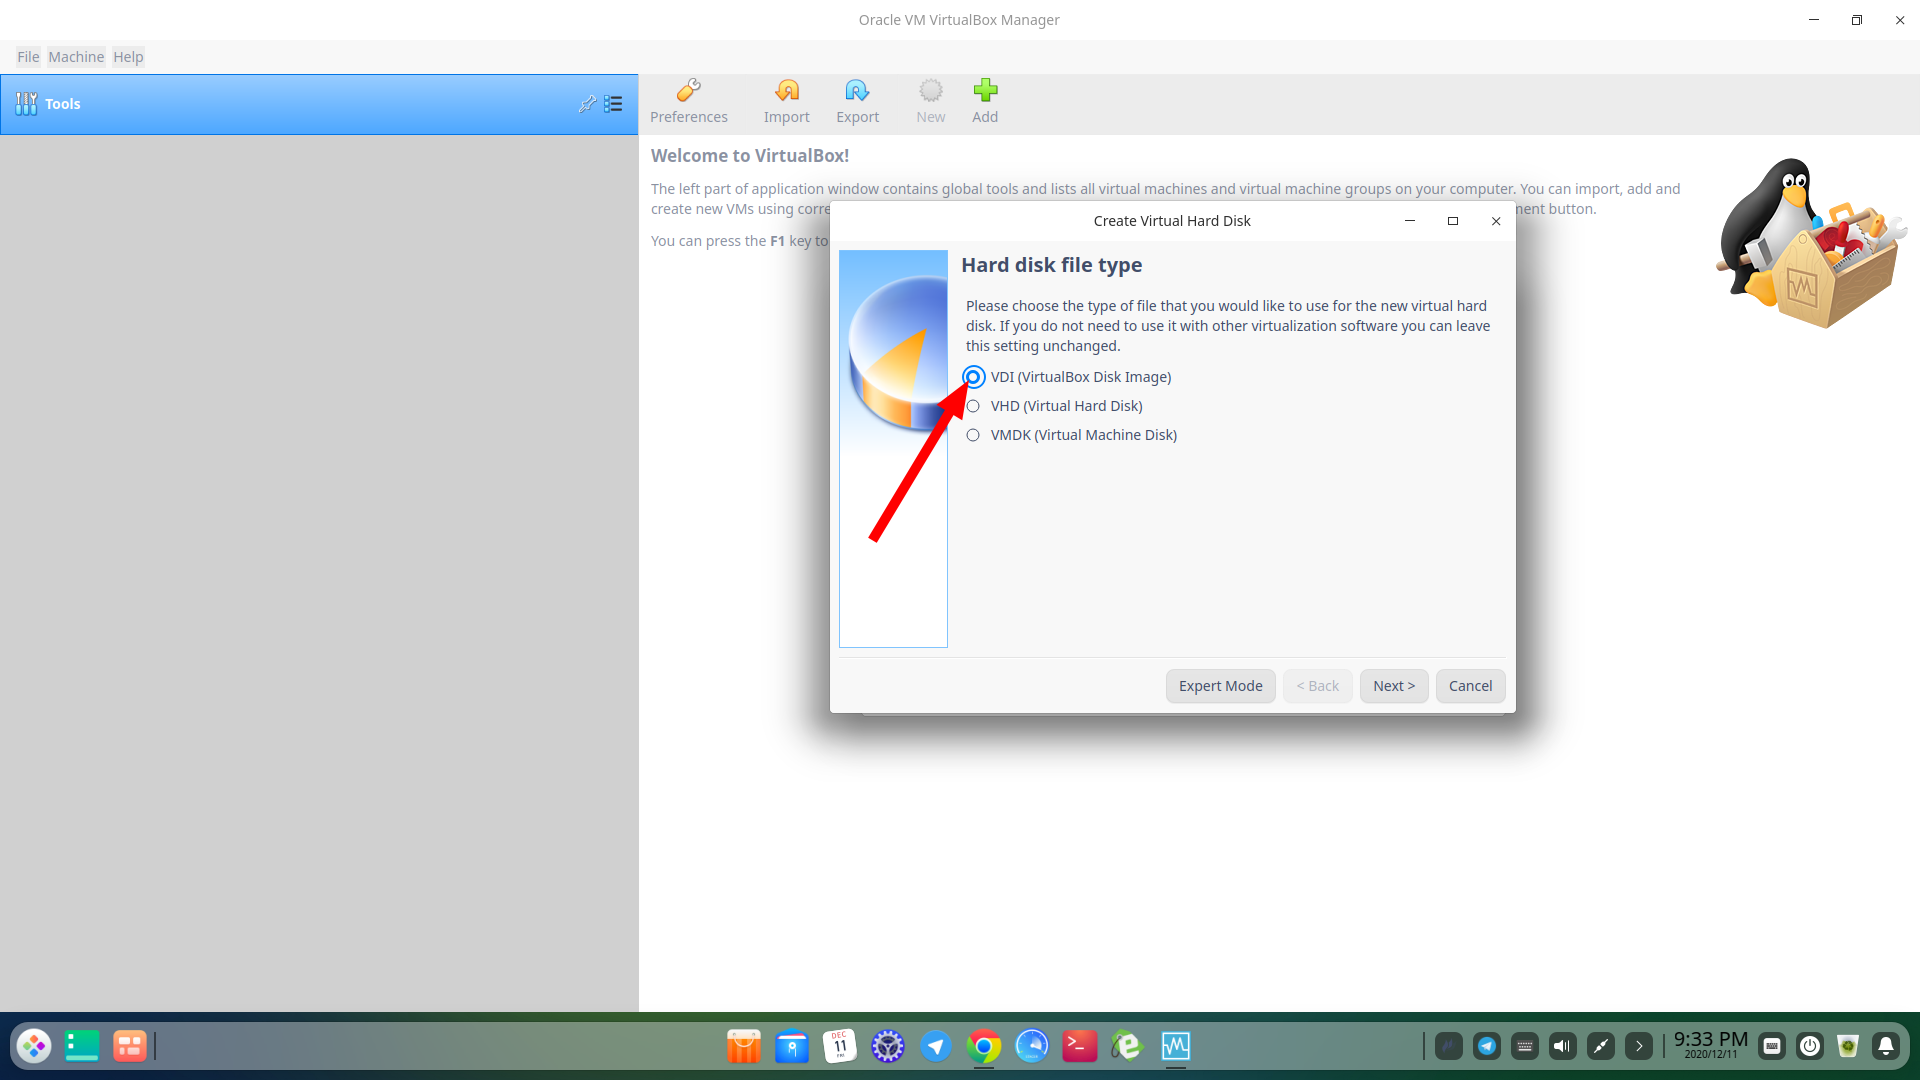
- Select “VDI (VirtualBox Disk Image)”
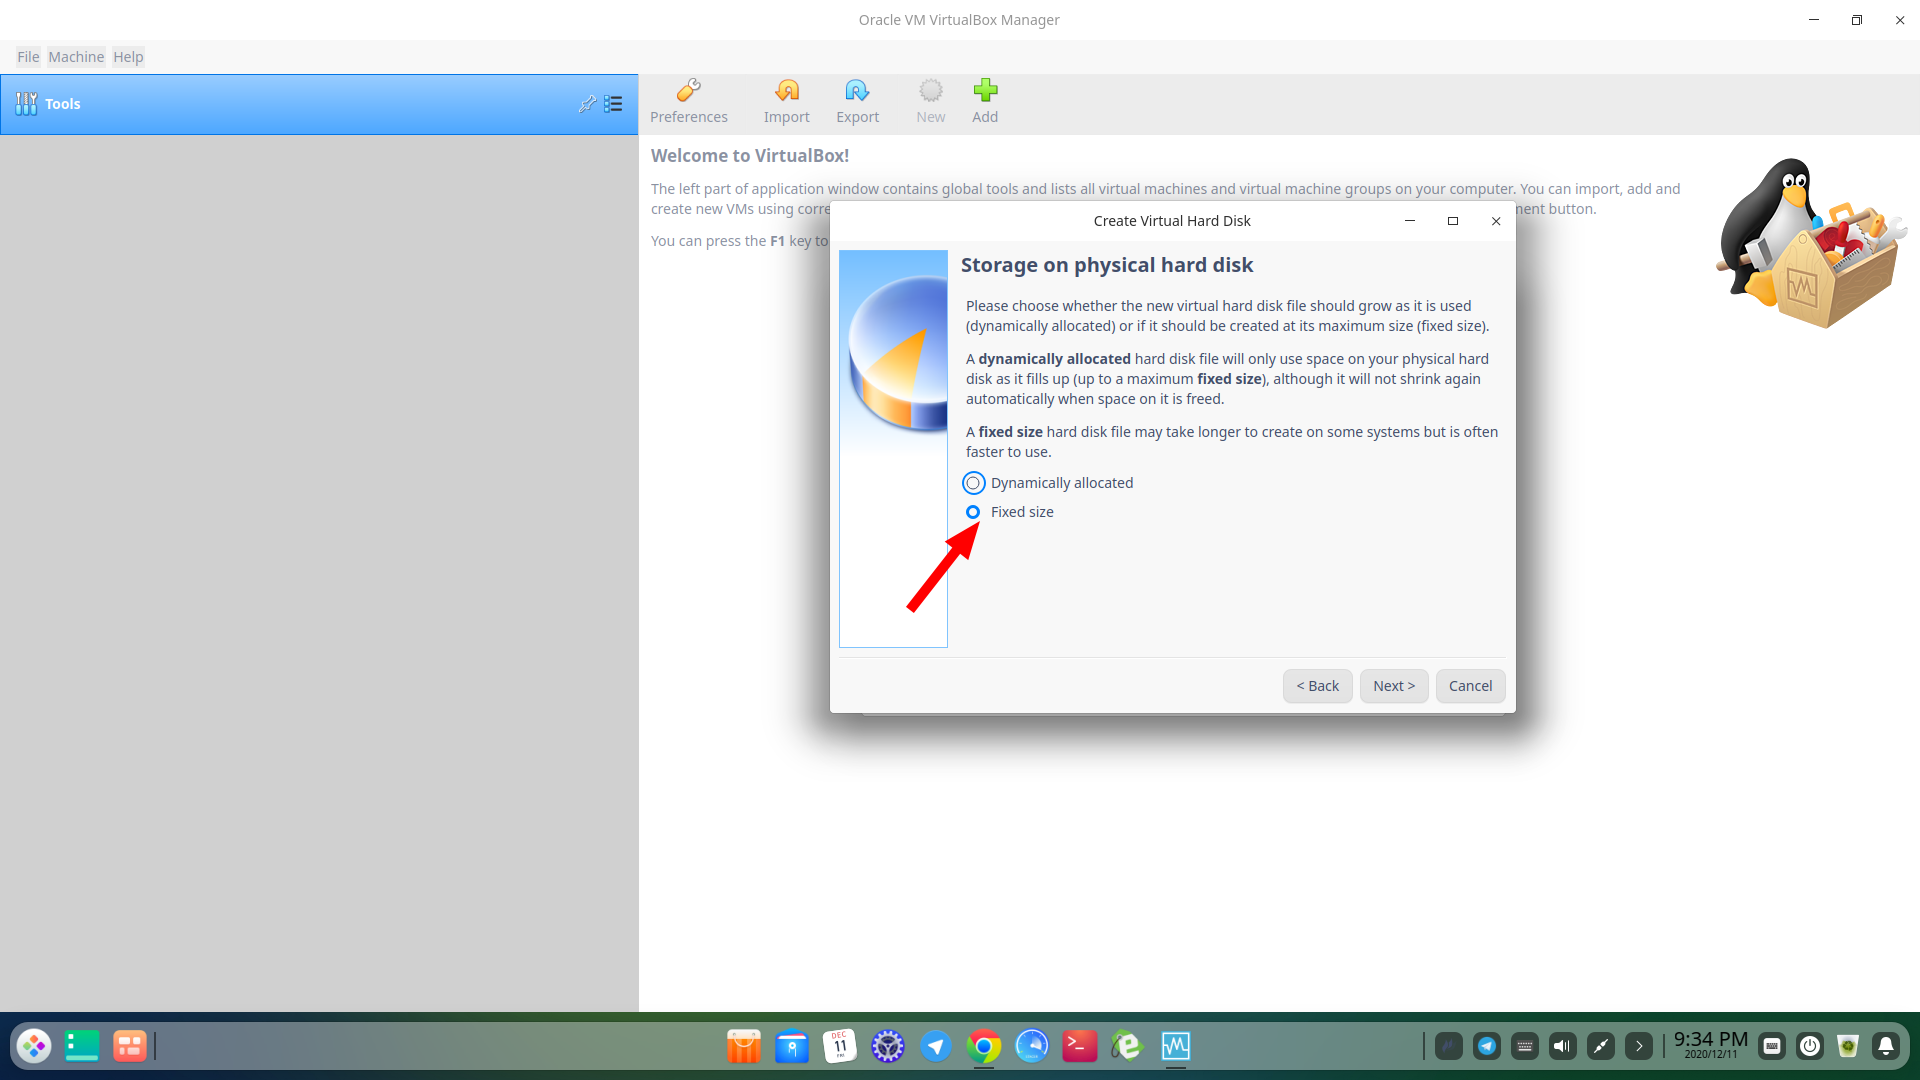
- Select “Fixed size.”
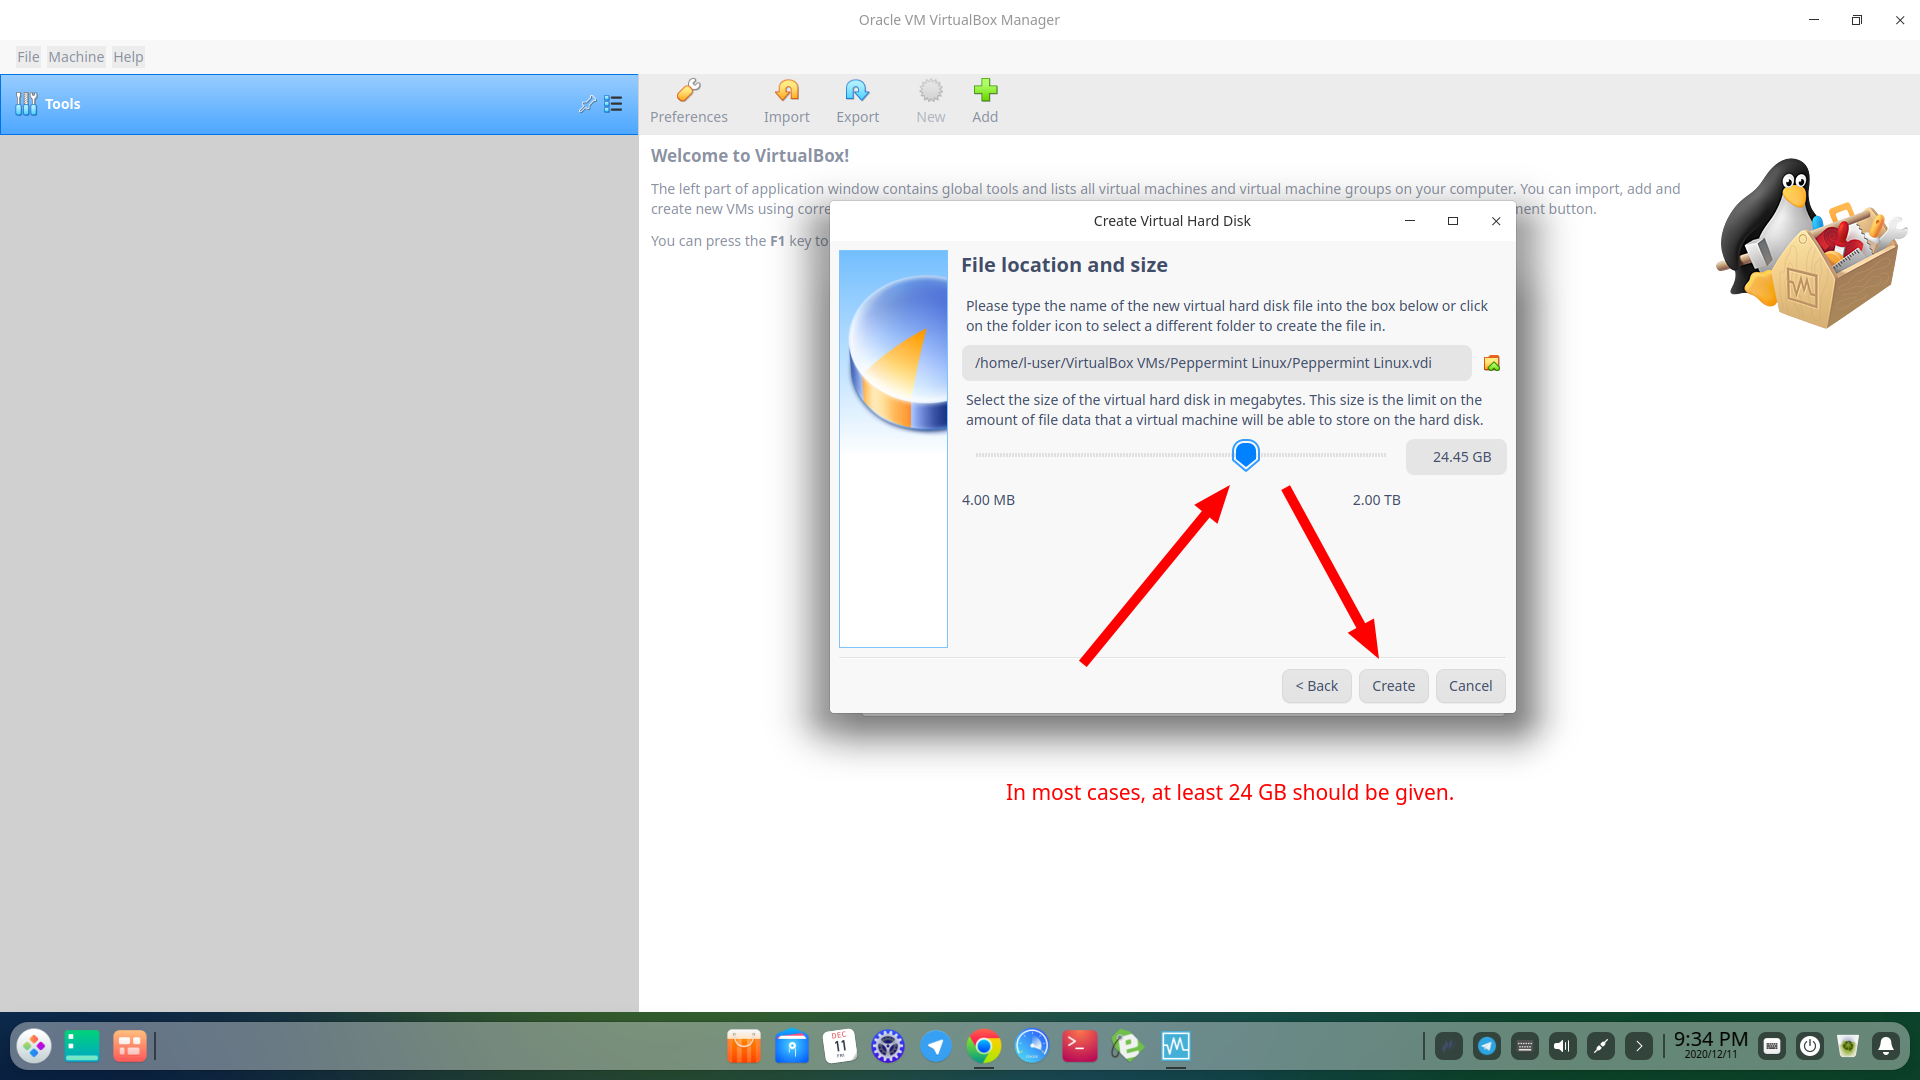
- Select at least 24 GB. Then click “Create”
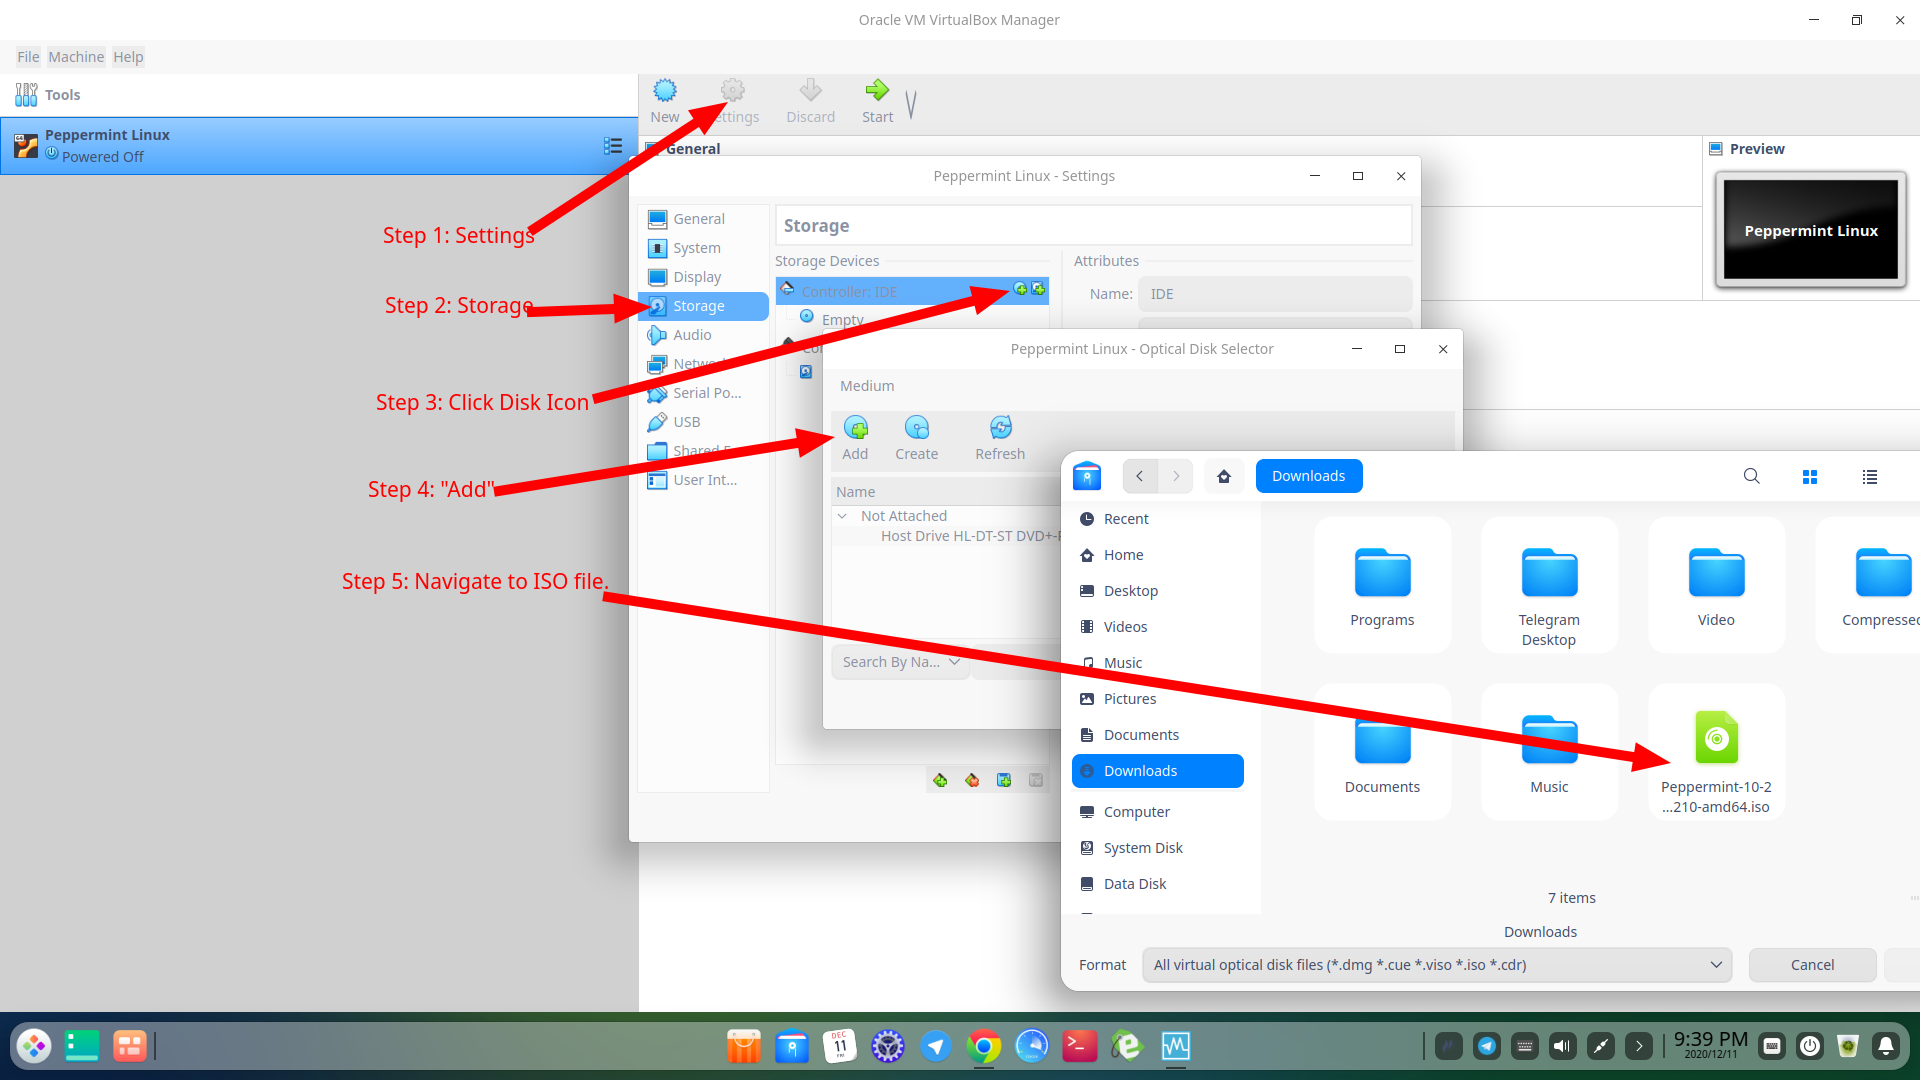
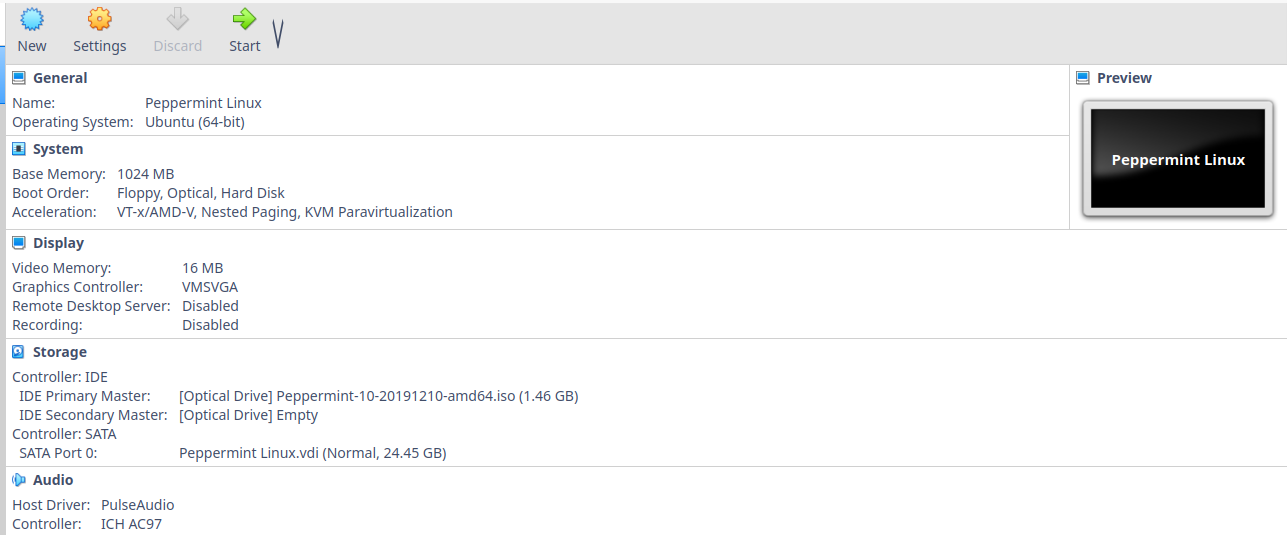
- You will be brought back to the main screen. Click the orange Settings icon at the top.
- Click “Storage” >> Click Disc icon >> Click “Add” >> Navigate to the ISO file >> Confirm/Select.
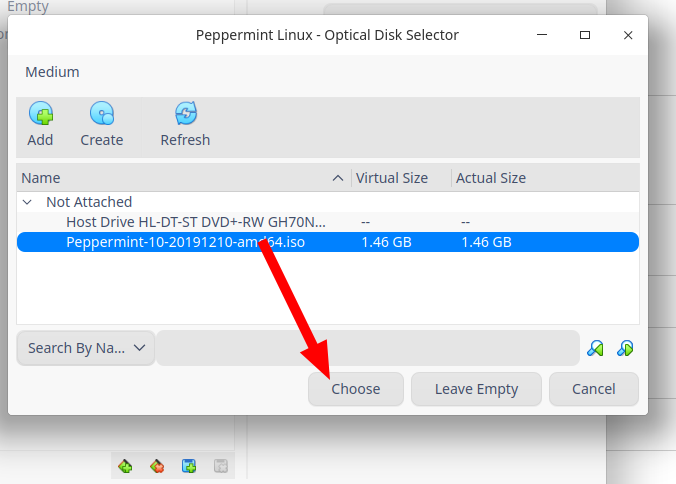
- When you see the window for “Optical Disk Selector”, just select/highlight “Peppermint” and click “Choose.”
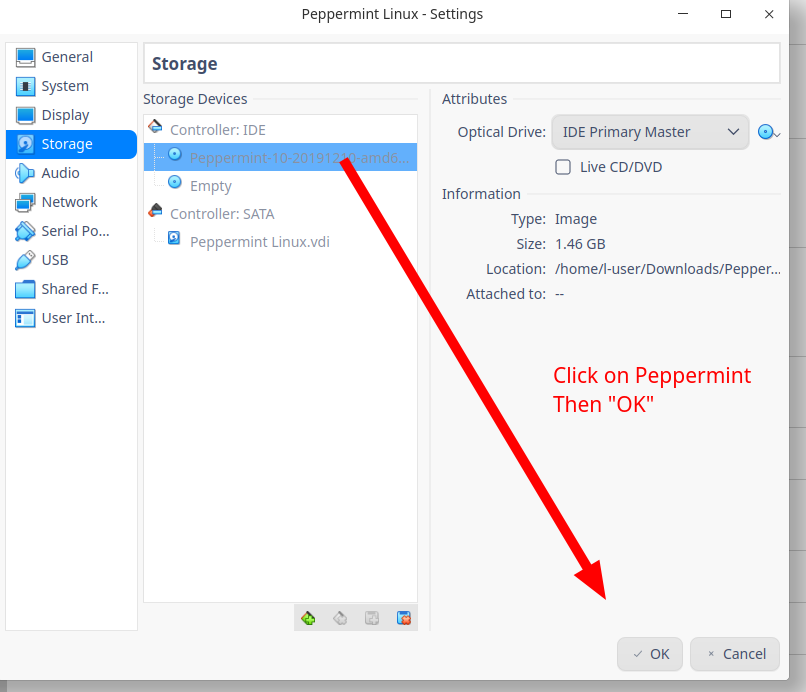
- Select “OK”
- Click the green “Start” icon.
Once it begins, you’ll be greeted with a screen like so:
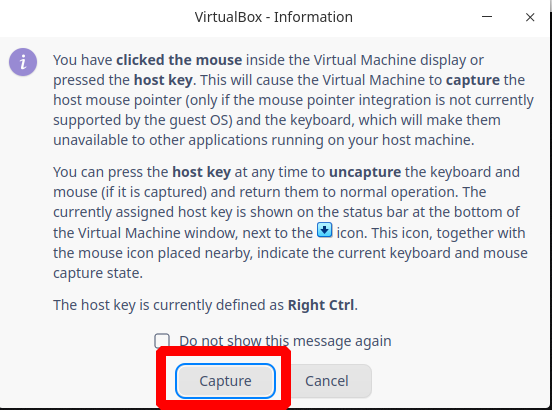
Please understand that once you hit “Capture”, your mouse will move only within the small OS window, not anything outside of that tiny window. To move your mouse on your own computer, just hit the ctrl key and the right-click mouse key at the same time.
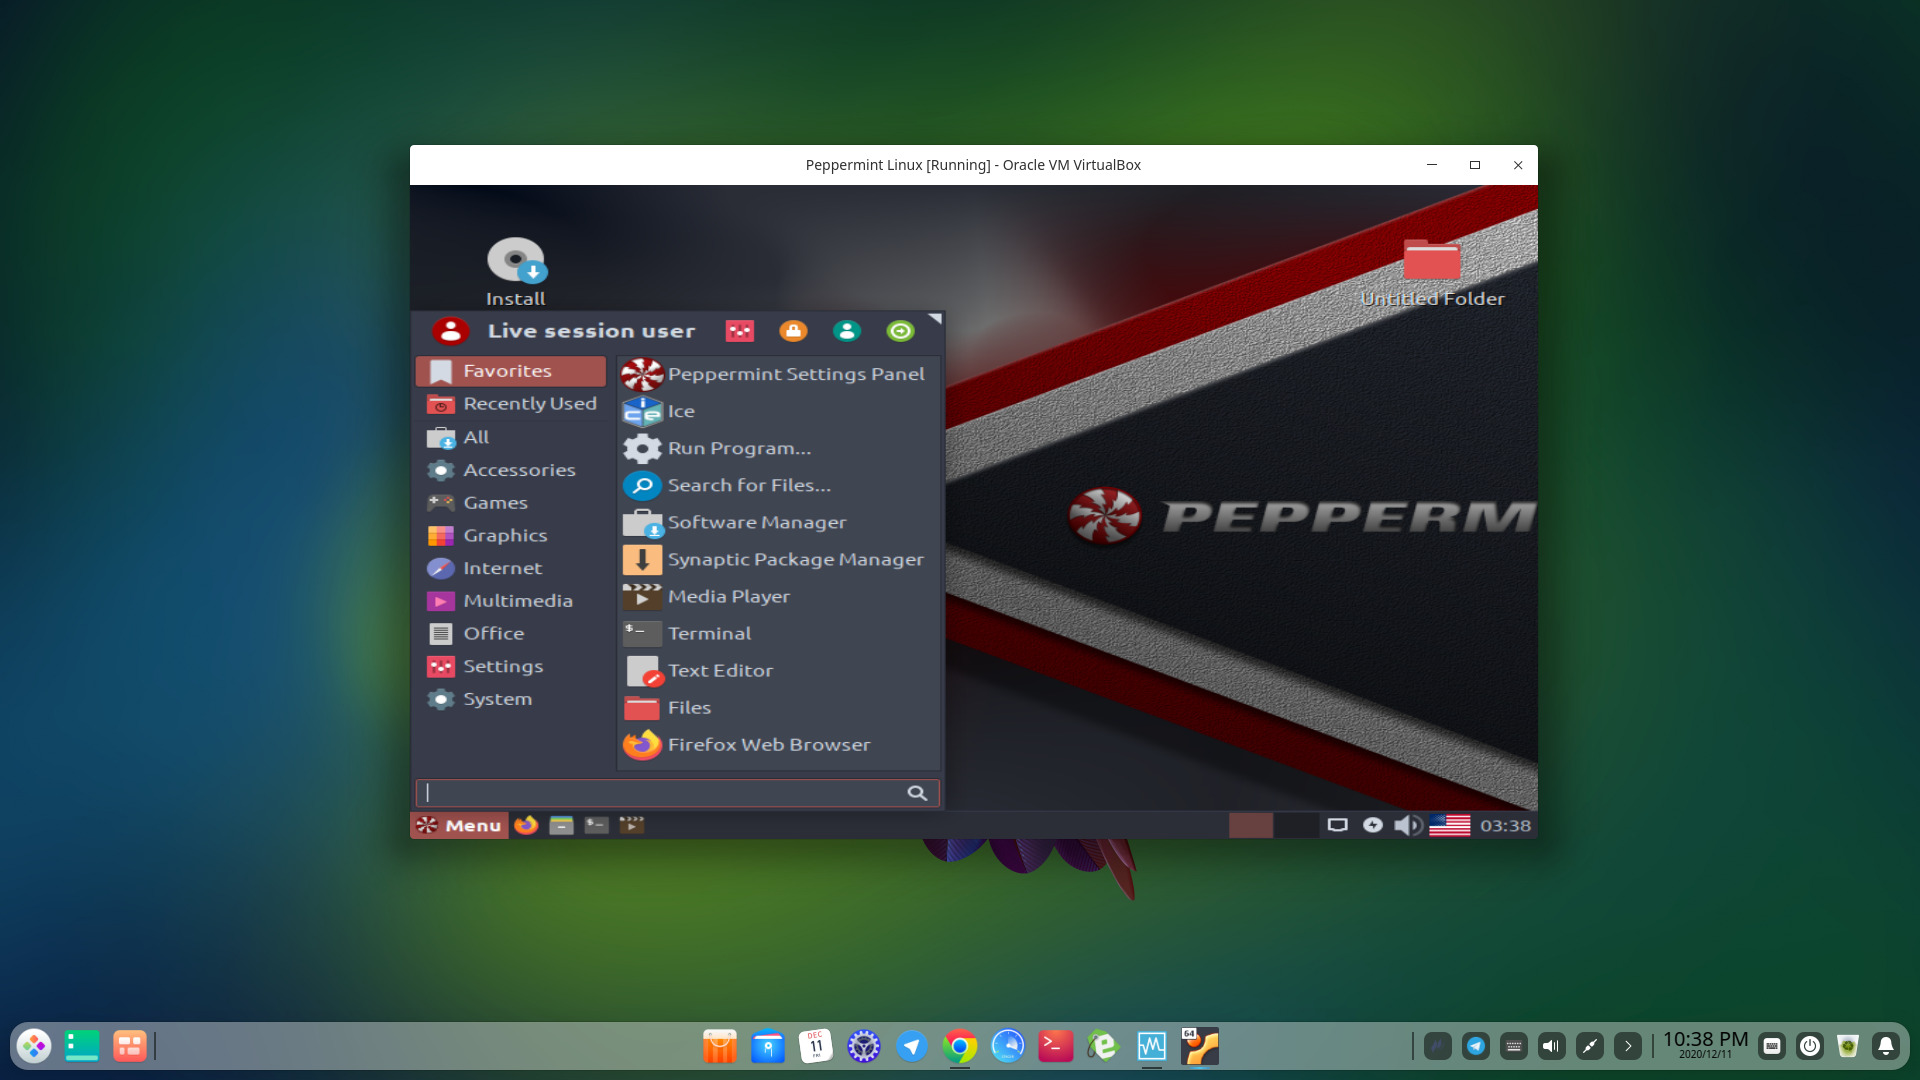
Anyway, once you hit “Capture”, you’ll load the OS automatically.
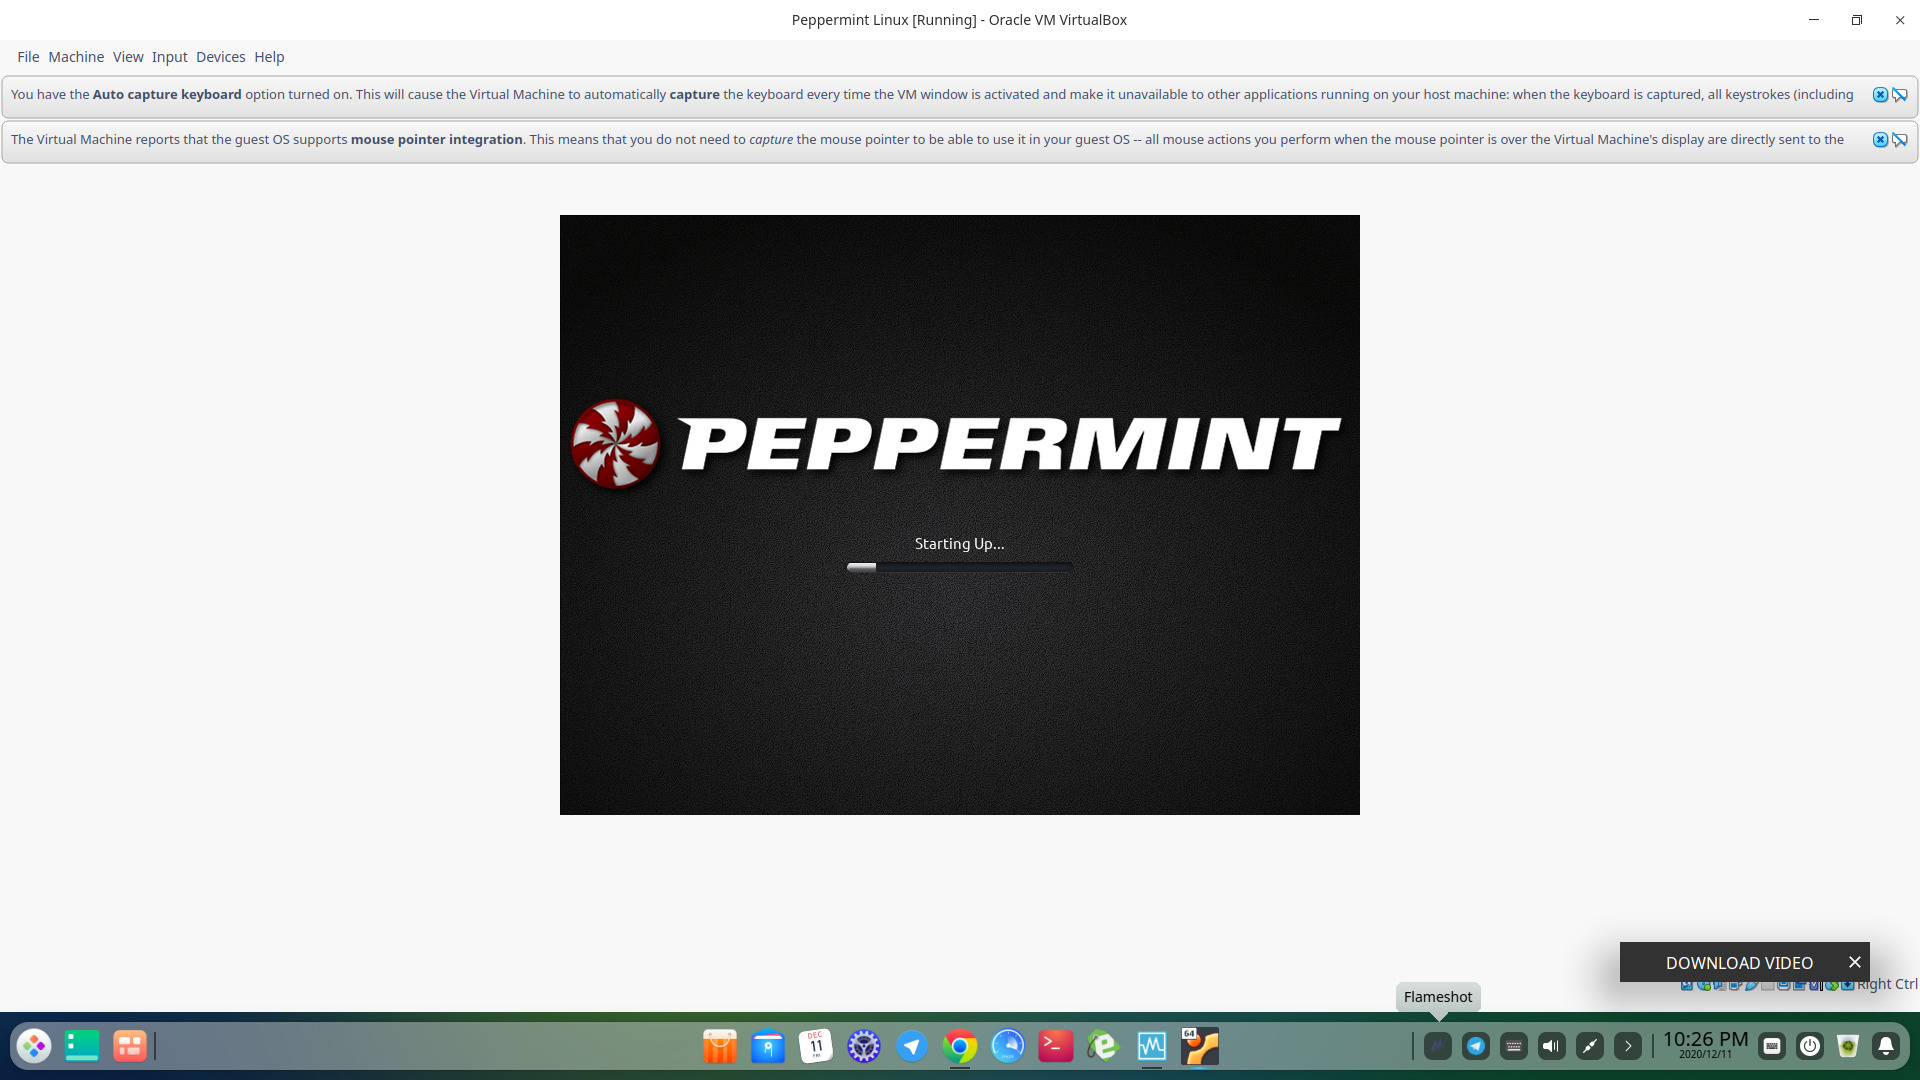
Finally, once it loads, you can use the OS as you please!