In this tutorial, we’re going to show you how to connect to a VPN on Ubuntu. Beginner-friendly, step-by-step instructions with screenshots.
Before we begin
You can always connect to a VPN using the VPN provider’s client app (if they have one). This tutorial will show you how to use Ubuntu’s built-in VPN feature that allows you to connect to a VPN straight from the system itself, without the need for a client app. It’s what I prefer using instead of a client app. It’s more seamless for my simple use case.
Some people may assume that you won’t need to use a VPN on Linux because it’s considered more secure. However, there are always use cases for a VPN, regardless of what OS you are using.
You’ll need to have a VPN – either set up your own or buy one. There are lots of providers to choose from. Some websites (like this one) do detailed comparisons and reviews of the best Linux VPNs, so that example will help out in your choice.
Once you get a VPN, you can follow the steps below and start the tutorial.
Step 1: Find the VPN Settings page
Open up Settings and click on the Network tab. This is where you’ll find the VPN page.
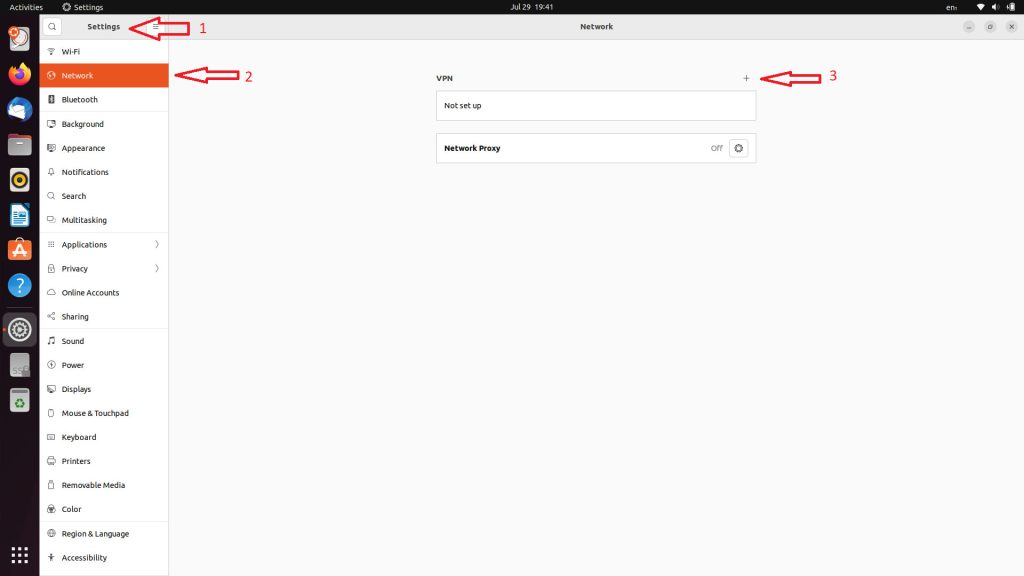
To start setting up your VPN, you need to click on the + button.
Step 2: Add and set up the VPN
Once you click on the + button, you’ll get a pop-up window with 3 options:
The most commonly used options are OpenVPN and just importing from a file.
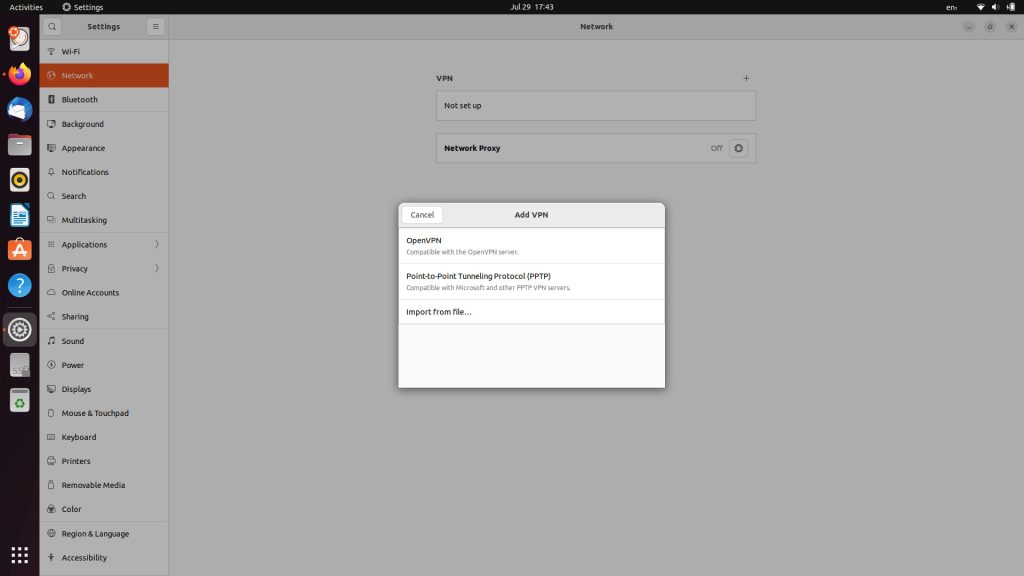
In most cases, VPN providers have a file you can download and then import using the third option. Check your VPN provider’s dashboard, check your emails, or just contact them asking for a file you can use. You’ll also need to note your username and password, you can find them in the same area where you’d find the VPN file.
Once you import the file, you’ll need to also add the username and password.
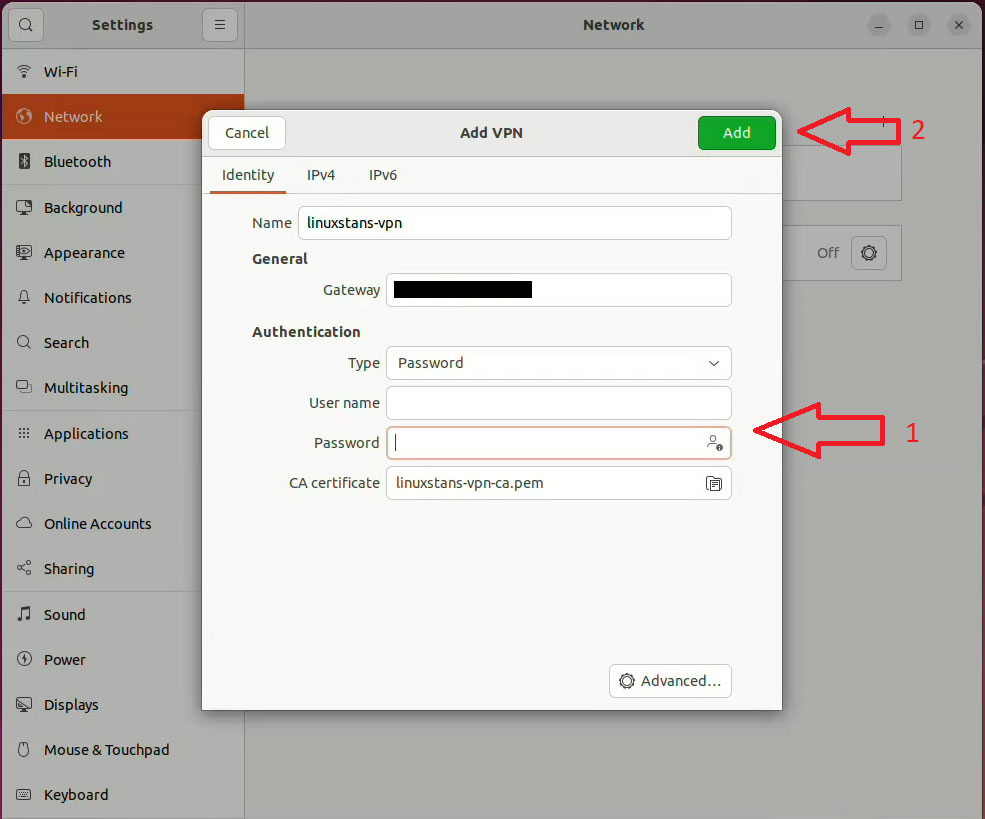
Add the authentication details and once done, click on the green “Add” button.
Step 3: Start using the VPN
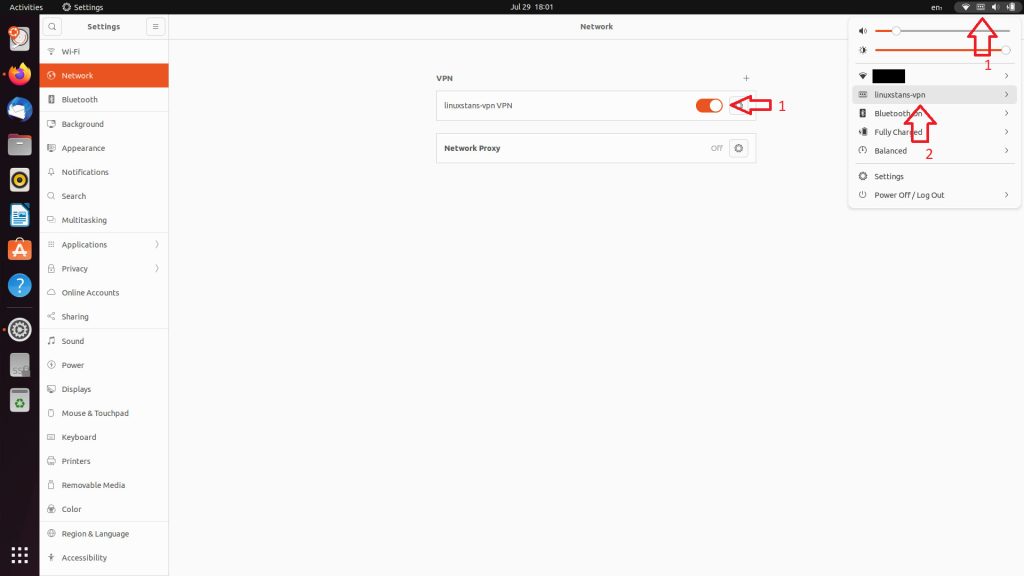
Now that the VPN is set up, you can start using it. To turn it on, either use the VPN settings page and click on the gray toggle or use the system menu from the top bar (which is easier) and turn it on from there.
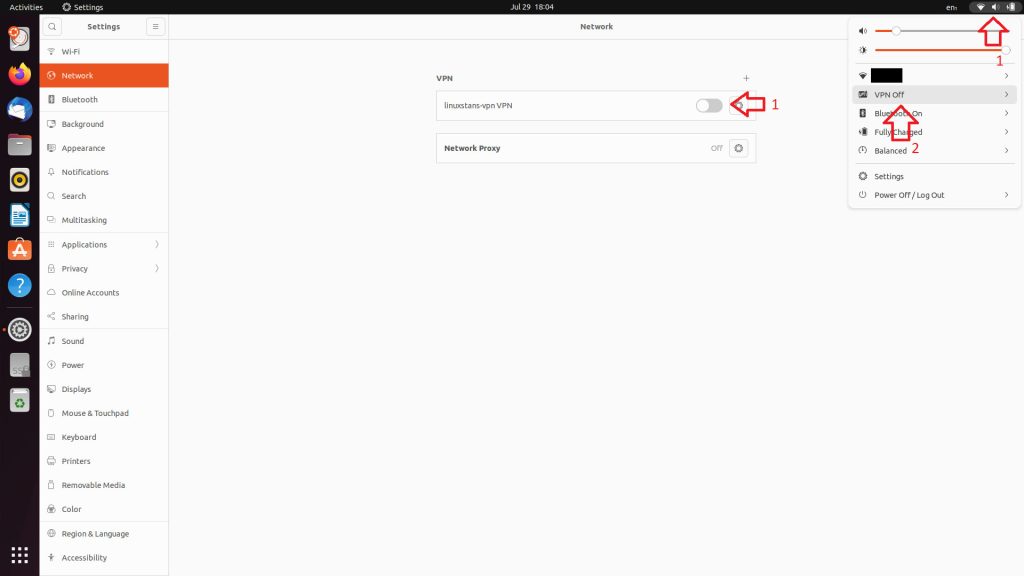
To turn the VPN off the same way you turned it on, either from the VPN settings page (click on the orange toggle) or from the system menu (click on the VPN name and then click on Turn Off)
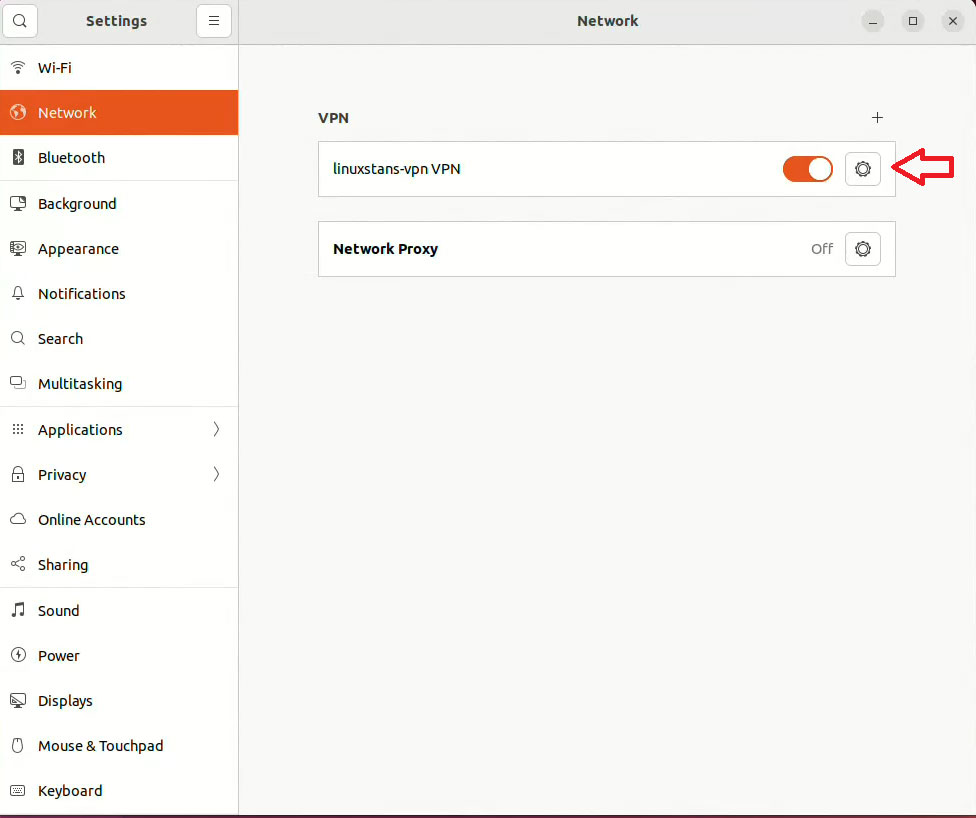
Step 4: Configure the VPN
If you want to configure the VPN you’ve already added or adjust some settings, you can do it by clicking on the cog icon/button from the VPN settings page.
More details about a VPN on Ubuntu
If you want to add another VPN, just follow the steps in this tutorial again. You can add as many VPNs as you want to.
To remove a VPN, click on the Cog icon/button and remove it from there.
If you’re using a client app from the VPN provider, none of these settings or steps apply to you. The client app will have its own instructions and way of setting it up. Most Linux VPN client apps are simple. In most cases, you just need to install the app, enter your username and password, and connect to a VPN from a large number of available locations/servers.
This tutorial is really handy if the VPN provider you’re using doesn’t have a client app.
If you can’t find any of the steps or settings from this tutorial, you may not have Network Manager installed. You can install it by running:
sudo apt-get install network-manager
Although NetworkManager is installed by default on most Ubuntu distros.
If you have any questions, leave a comment below.


