In this tutorial, we’re going to show you how to install Chrome on Ubuntu. This tutorial was tested on Ubuntu 22.04, but it will work on other Ubuntu releases and Ubuntu derivatives.
Google Chrome is one of the most popular browsers for all OSes, including Linux. Firefox is pre-installed by default on Ubuntu. If you want to install Chrome, you’ll have to do it manually, it’s not available in the Ubuntu Software center. If you need other recommendations for browsers on Linux, check out The 4 Best Linux Browsers I’ve Used in 2022 and Top 5 Most Secure Browsers for Linux
We’ll show you how to install Chrome on Ubuntu via the command line (with a single command!) or via the graphical user interface (instructions with screenshots).
How to Install Chrome on Ubuntu with One Command (Terminal, CLI)
This might be the easiest way to install Chrome if you are at least somewhat comfortable with using the Terminal (CLI). The command below will download the latest stable release of Chrome, install the package, and run the browser.
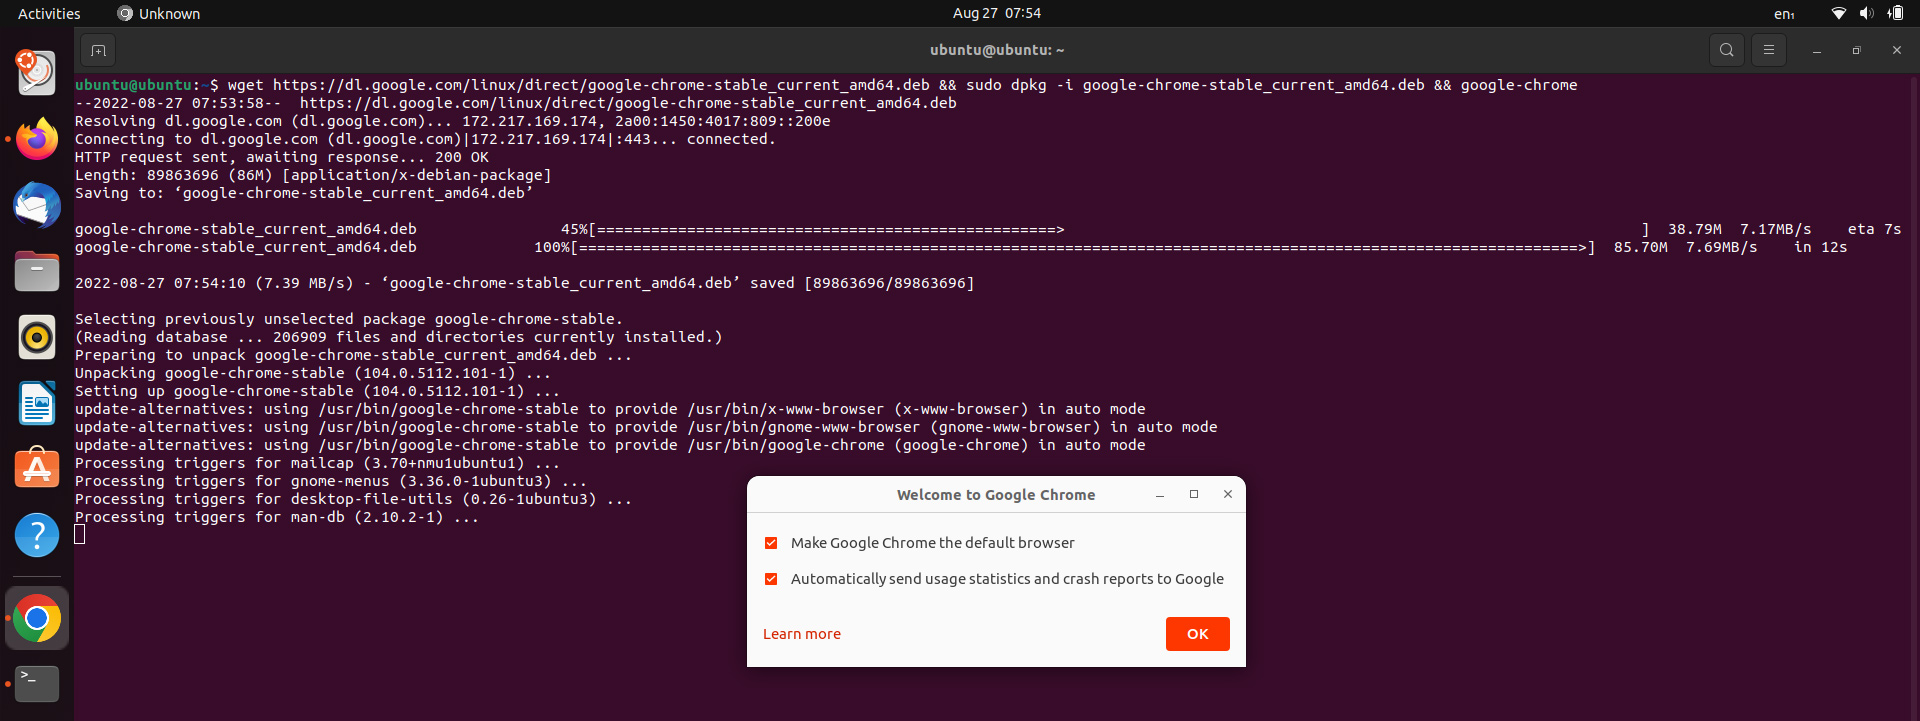
Open up Terminal (CTRL + ALT + T) and run the following command:
wget https://dl.google.com/linux/direct/google-chrome-stable_current_amd64.deb && sudo dpkg -i google-chrome-stable_current_amd64.deb && google-chrome
And follow the prompts for your passwords.
This command also works on Linux Mint, Debian, and other distros.
When the command is done, you will get a pop-up window asking you if you want to make Chrome the default browser and if you want to send usage statistics. Select your choices and click OK. And that’s it, you’ve successfully installed Chrome on Ubuntu. Chrome will start and you can start using the browser. You can skip to the step on how to add it to your Favorites (taskbar) after the command is done.
If you prefer to install Chrome via the graphical user interface, follow the instructions below.
How to Install Chrome on Ubuntu via the GUI (with step-by-step screenshot instructions)
We’ll show you every step of the way to help you install Chrome on Ubuntu – everything you need to do (with screenshots). These screenshots were taken from Ubuntu 22.04, so by the time you’re reading this they might be slightly different, but the instructions will still work.
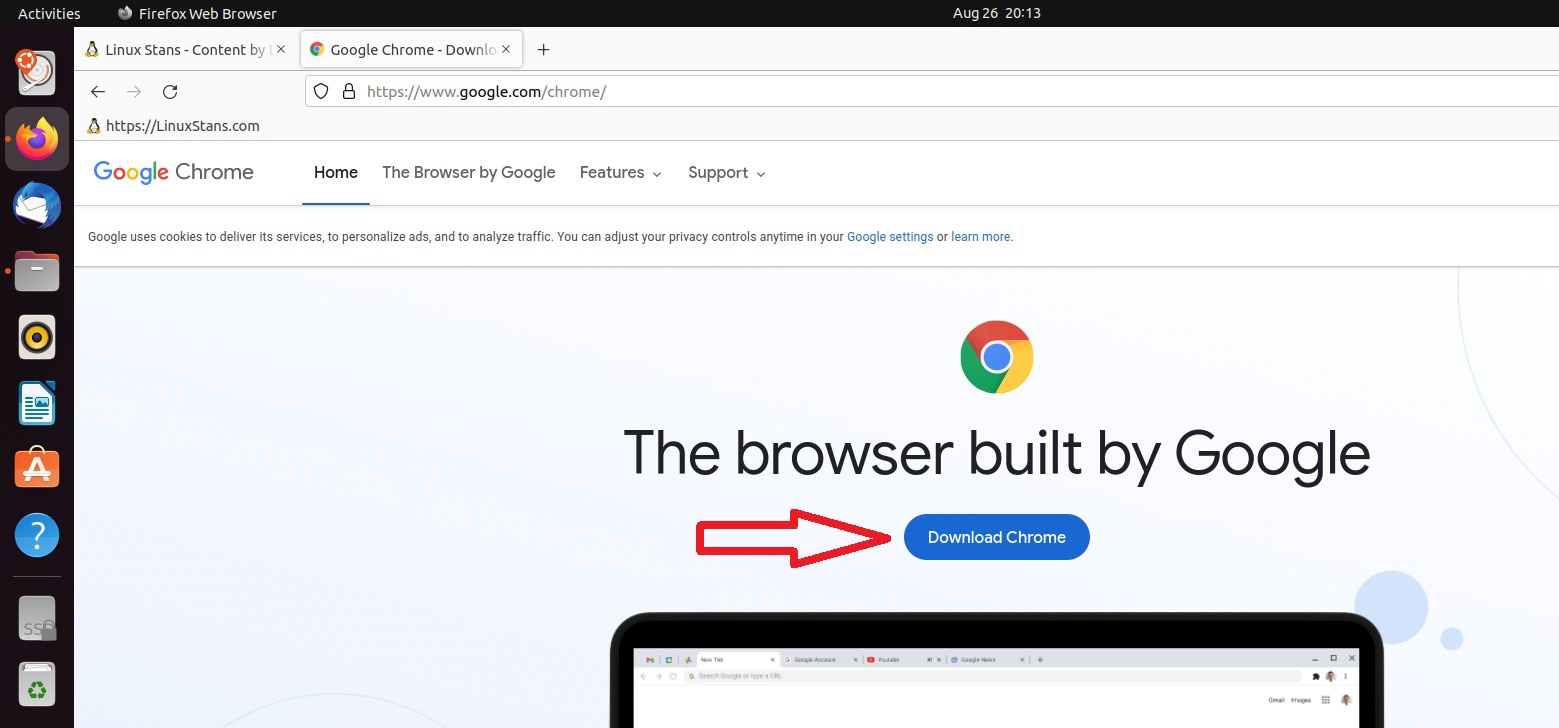
Step 1: Go to the Google Chrome page and click on Download Chrome
First, go to the Chrome page and click on the “Download Chrome” blue button.
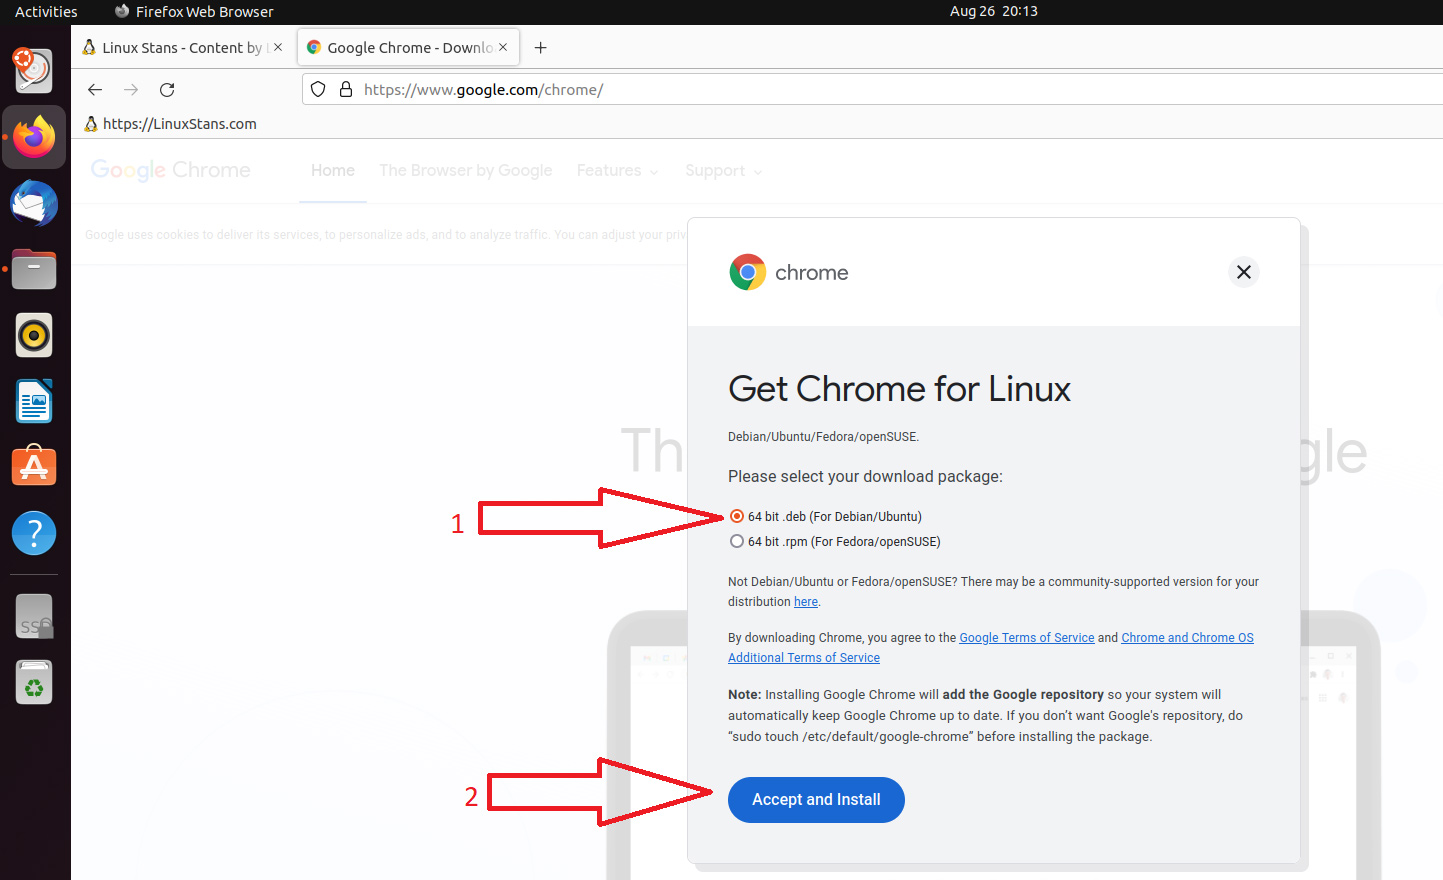
Step 2: Download the Chrome installation file for Ubuntu
After you click the Download button, you’ll get a pop-up window asking you which version of Chrome for Linux you need. Select the first option (Debian/Ubuntu) and click on the Accept and Install button.
After you click on the Accept and Install button, the download will automatically start. If it doesn’t automatically start, either click the link to “download Chrome manually” on the page you’ll be redirected to or use this link to directly download the installation file.
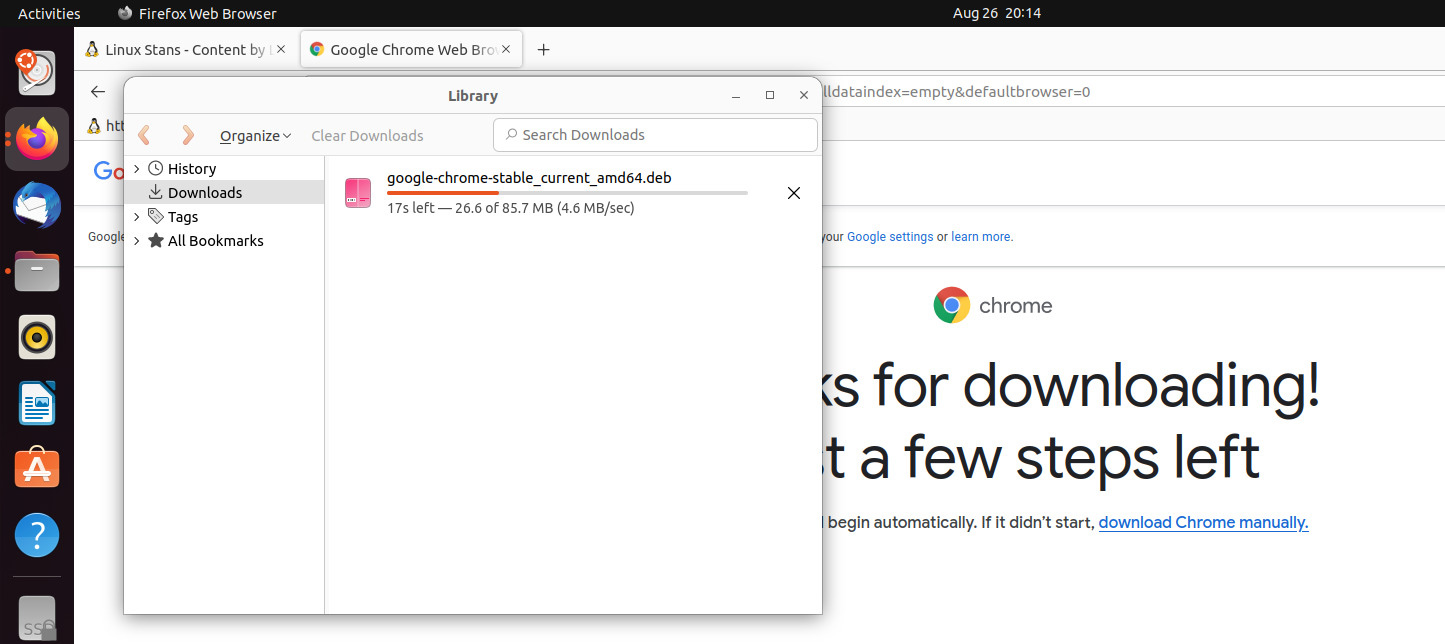
Step 3: Find and Open the .deb installation file for Chrome
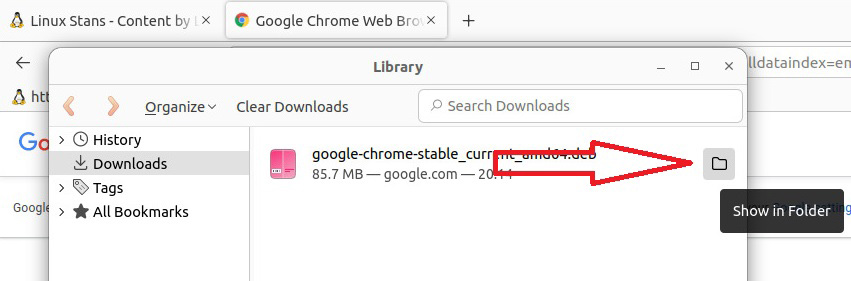
The installation file will probably be saved in Home -> Downloads, or whatever folder you chose earlier. However, you can also use the “Show in Folder” button to open up the exact location of the file once it finishes downloading.
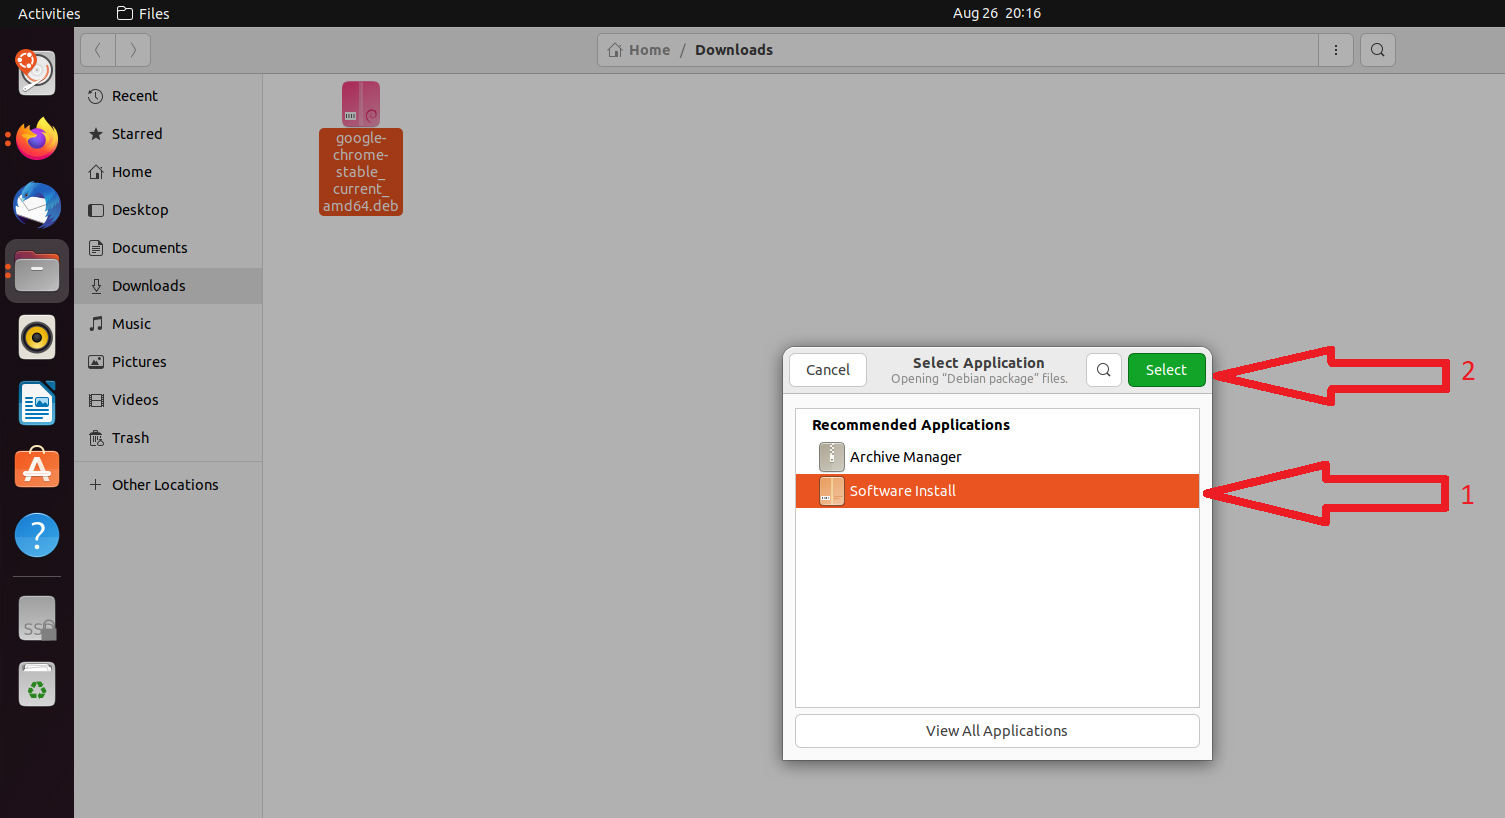
Once you are in the folder where the downloaded file is located, open up the file and choose “Software Install”, then click on the “Select” button. Alternatively, if you don’t get the option to choose what Application you prefer to open the file with, you can right-click on the file and choose the Open With option.
Step 4: Install Chrome with Ubuntu Software (Sofware Install) on Ubuntu
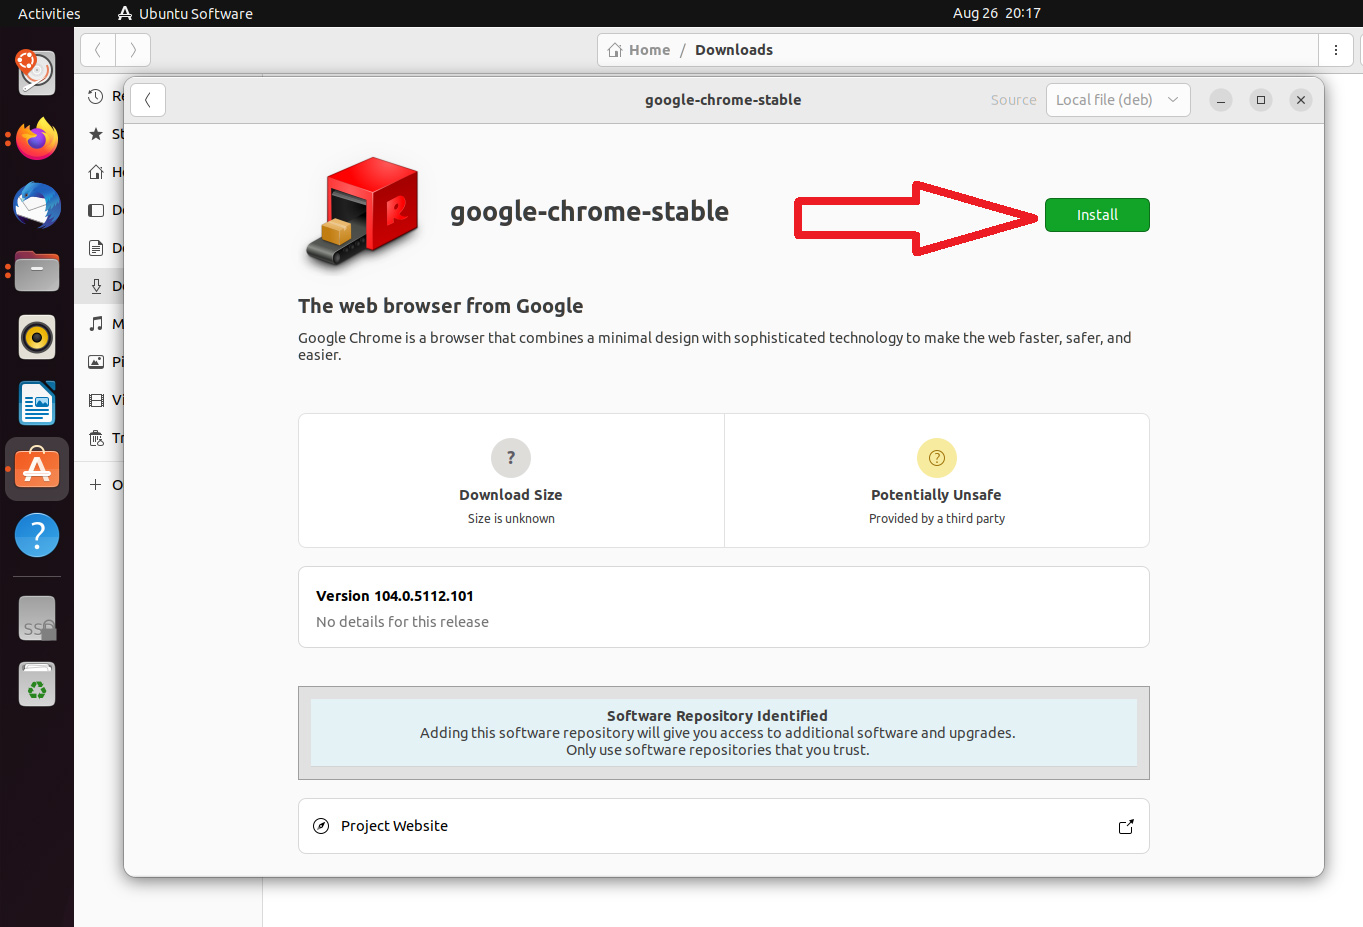
Once you open the file with Sofware Install, a new window from Ubuntu Software will pop up with an option to Install the google-chrome-stable package. You need to click on the “Install” button, enter your password, and wait for a bit. And that’s it! Chrome will be installed on your Ubuntu.
Step 5: Open Chrome and add it to your Favorites (Taskbar)
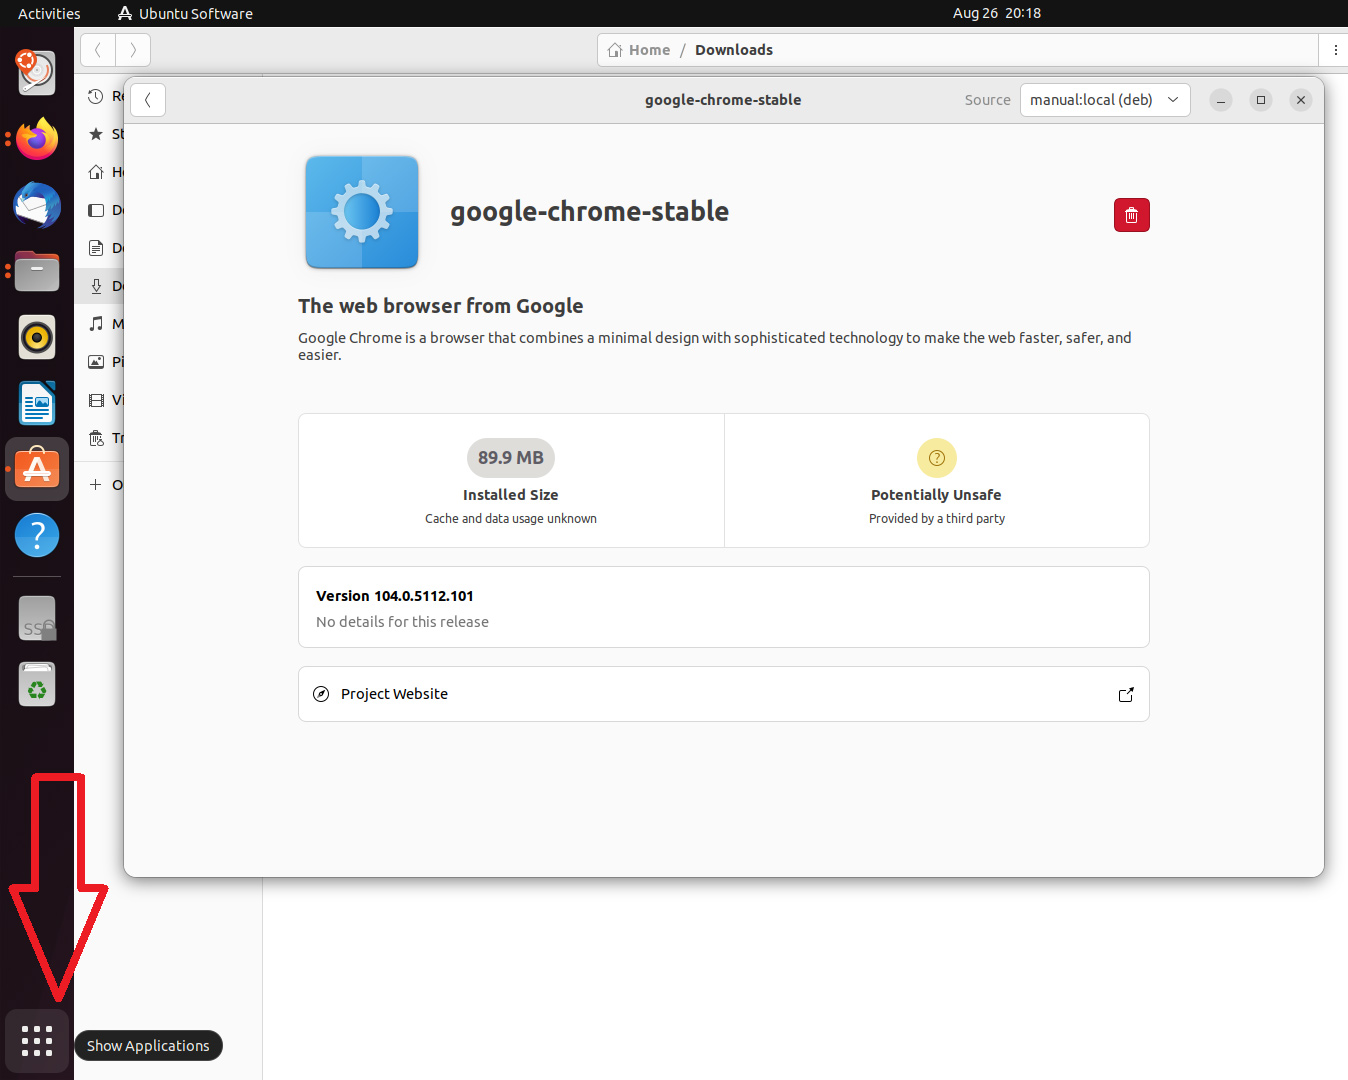
To open the Chrome browser in Ubuntu, first, click on the “Show Applications” button or use the “Windows” button on your keyboard.
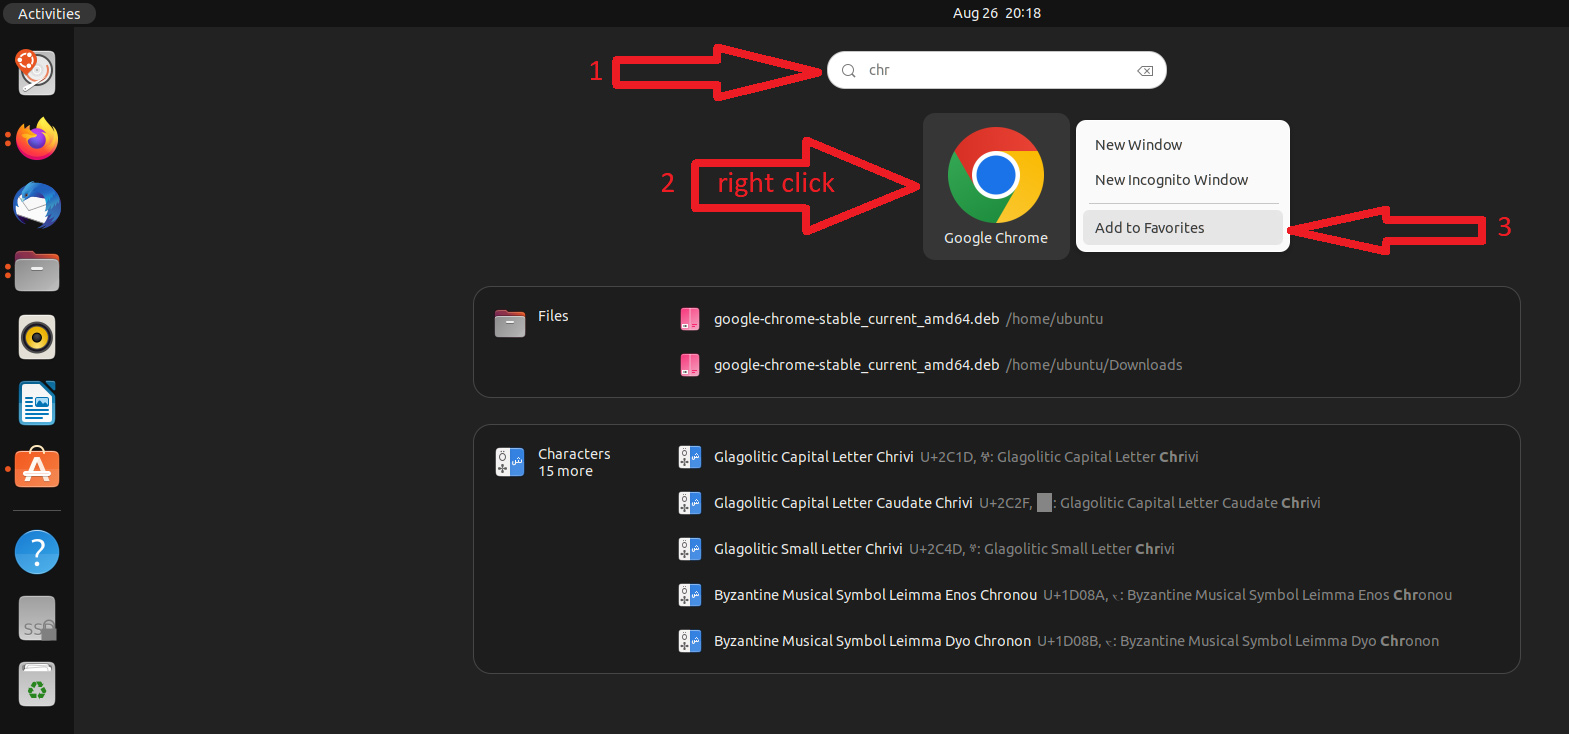
Next, type “chrome” and a Google Chrome icon will appear. The icon will show up even when you type in “ch”. You can open Chrome by left-clicking that icon or just hitting the Enter button.
To add it to your Favorites (taskbar on the left), right-click on that icon and click on “Add to Favorites”
Once you add Google Chrome to your favorites, you’ll have a Google Chrome icon in your Taskbar (on the left)
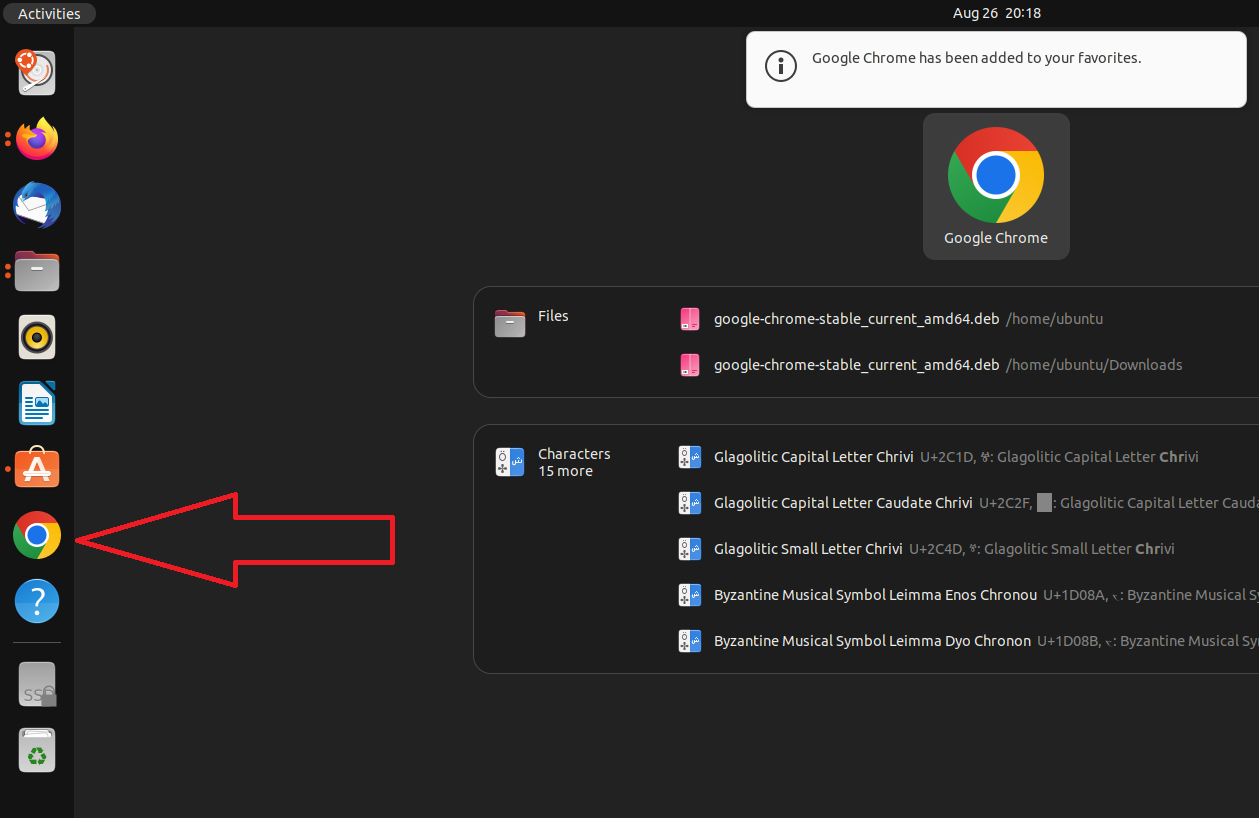
You can now use that icon to open Chrome. To move it around the taskbar (move it to the top), just click and hold the icon, then move it to wherever you want it to be.
That’s about it. We’ll show more instructions below on how to uninstall or update Chrome, and answer a few FAQs.
How to Uninstall Chrome on Ubuntu
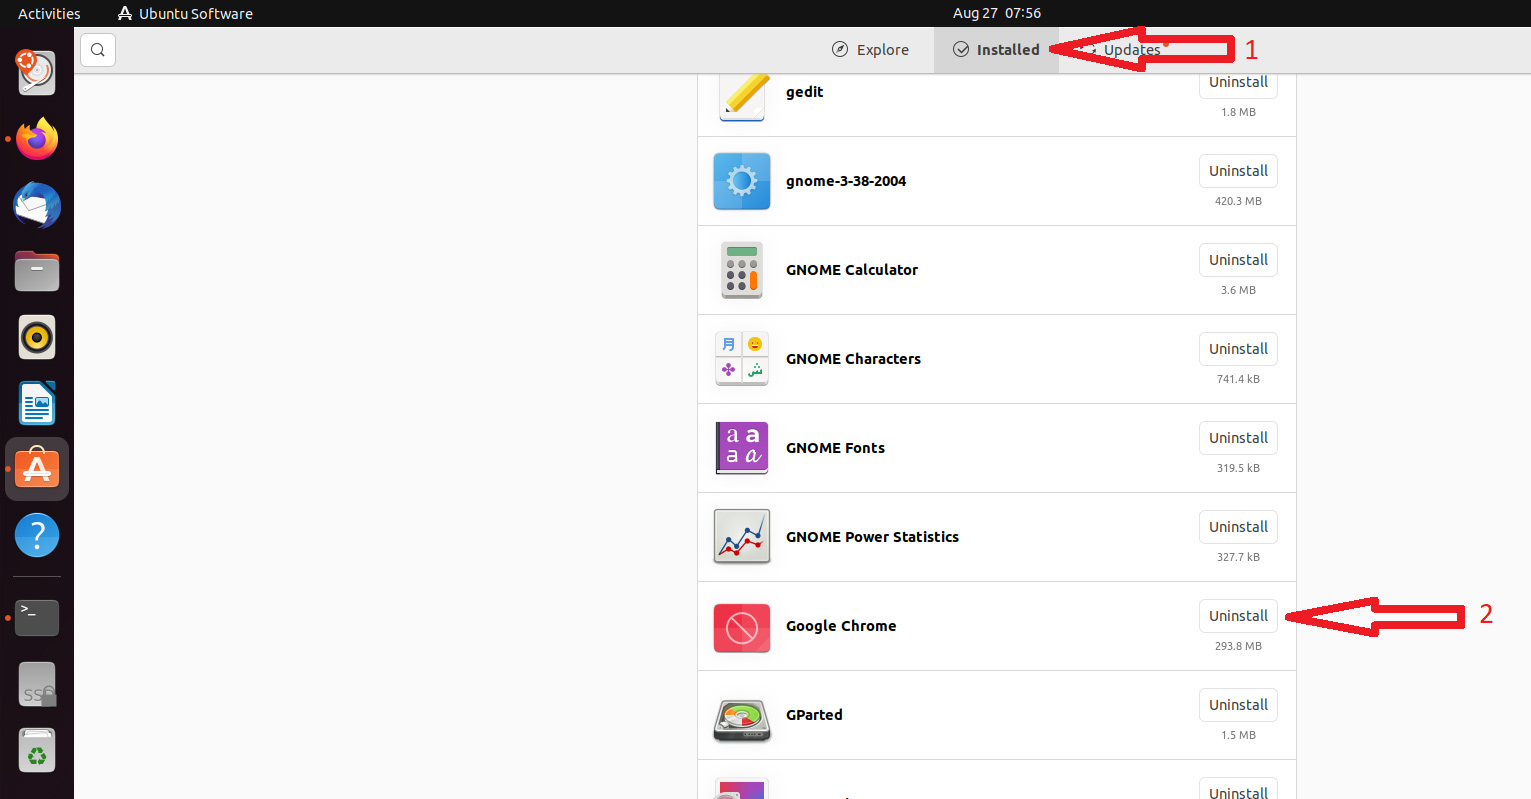
To uninstall Chrome, you’ll need to find it in Ubuntu Software and click on the “Uninstall” button. The exact steps are:
- Open Ubuntu Software Ce (you can do it by searching for “ubuntu software” from the Show Applications button)
- Click on the “Installed” tab to get a list of all the installed apps on your Ubuntu
- Scroll down and find “Google Chrome”
- Click on the grey Uninstall button on the right and a pop-up window will appear. Confirm that you want to uninstall Chrome by clicking on the red Uninstall button
Or you can also use Terminal and just run the purge command “apt purge google-chrome-stable”.
How to Update Chrome on Ubuntu
When installing Chrome, your repo list will be updated with a Google Chrome repository. This means that you can update Chrome while updating all other software with the apt update and apt upgrade commands, or you can use Ubuntu Software Center (the Updates tab), and you can also use Software Updater.
Google Chrome is just like any other app on your Ubuntu software, so there’s no special method to update it.
FAQs about Installing Chrome on Ubuntu
Here are some frequently asked questions with answers about installing Google Chrome on Ubuntu:
Why is there no 32-bit version of Google Chrome for Ubuntu?
Ever since mid-2016, there’s (sadly) no longer a 32-bit version of Google Chrome for Ubuntu. However, some alternatives do have a 32-bit version you can use like Chromium.
How to make Google Chrome the default web browser in Ubuntu?
When you first installed Chrome, you’ll get an option to make it the default browser by clicking on that checkmark. If you want to do this later, you can do so by using the “Default Applications” app. Press the Windows key or open “Show Applications”, type in “Default Applications” and open the app. For “Web” select “Google Chrome” and that’s it.
What are the system requirements for Google Chrome for Ubuntu?
The Chrome system requirements for Ubuntu are:
- 64-bit Ubuntu 18.04+
- An Intel Pentium 4 processor or later that’s SSE3 capable
If you have any questions about installing Chrome on Ubuntu, feel free to leave a comment below.


